Thursday, March 31, 2011

Baked Ginger Donuts w/Orange Icing & A Tour of DC Hoods

Last Saturday was the SunTrust National Marathon and Half Marathon in Washington, DC. Exactly two years ago from this race, Travis and I purchased our first home in Northeast DC, which happens to be on the race route (both going out and coming in - I hope everyone waved twice). We closed on Friday, ran the race on Saturday, and moved in on Sunday. Can you imagine? You've just bought your first house, and the very next day you run in a hometown race that goes right by it! You better believe I announced it to some strangers while running by.
Last year, we skipped the National Marathon/Half in favor of the Shamrock Marathon in Virginia Beach (which, ps, was superfun and really well run). But this year, we were BACK. My plan was to rock the socks off the half and hopefully get a PR. That dream went out the window in mid-February when I realized that I was going to be out of town for 4 of the 5 next weekends. No prob. Race day was beautiful, I gave it my best, and it was still an awesome race.

The coolest thing about the National Half is that it's really a locals' race. Washington has a lot of destination races: Marine Corps Marathon, Cherry Blossom 10-Miler, Army 10-Miler. These races draw participants from all around the country (and often, the world) and they are wonderful in their own right. Who wouldn't want a chance to race by the national monuments or run through the breathtaking Japanese cherry blossoms in full bloom? But it's so refreshing and fun to do a race that hits the residential DC neighborhoods, which is exactly what the National Marathon and Half courses do.

Fleet Feet, a locally owned running store in Adam's Morgan, set up a bonus water stop right where I got thirsty. And a little ways down the road in Columbia Heights, some all-star resident was handing out marshmallow Peeps outside her house! A little Rapper's Delight outside of Howard U? Don't mind if I do. And to the DJ spinning at the Bethune apartment complex, I'd like to hire you for my next party. The race rounded out on H Street, NE, with a huge cheering crowd (you can't even imagine how the landscape of H Street has changed since running down it two years ago!). And of course, a big high-five to my house right before cruising to the finish line. 
After the race, we headed to our friends' Jimmy & Janie's house for a near-spring/almost birthday/post-marathon brunch. (Because if there is one thing I do almost as much as I run, it's eat brunch.) J&J served tacos from Pica Taco in Adam's Morgan, which I highly recommend. If you don't have time to make a full brunch (e.g., if you're tied up in a race beforehand), these tacos come in pairs, wrapped in tin foil and labeled - super easy for serving and muy delicioso. Plus Pica Taco is locally owned and operated by a mother-daughter team. It's a win-win. My contribution to brunch was ginger-spiced mini-donuts with fresh orange icing. Not really sticking with the Mexican theme, but I didn't hear any complaints through the donut-stuffed mouths.

I recently purchased this donut pan so that I could make baked donuts. These ginger guys were more like cake donuts than bready donuts (like say, Krispy Kreme). But the batter bakes up super light and the outside gets nice and toasty, just like any fried cake donut. Top them with icing made from fresh orange juice and sifted confectioners' sugar and you've got yourself a brunch winner.

This is us two years ago when we closed on our house! I still feel happy about it every time I walk in the door. Yes, despite the entire new roof we had to put on, frequent blown fuses, termites (among other critters), touch-and-go heating system, and leaky walls, I love this house with all my heart.

Baked Ginger Donuts w/Orange Icing
adapted from Allrecipes.com 
Makes 4 to 5 dozen mini-donuts

Donuts
3 cups unbleached, all-purpose flour
2 tsp. baking powder
1 tsp. baking soda
1 tsp. nutmeg
1/2 tsp. ground clove
2 tsp. cinnamon
1-1/2 tsp. ground ginger
1 cup sugar
1/2 cup (1 stick) melted butter
2 tsp. freshly grated ginger
1 cup of buttermilk (or 1 cup milk + 1 tbs. vinegar, rested for 5 minutes)
3 eggs
1 tbs. maple syrup

Required: non-stick donut pan
Recommended: gallon-sized ziplock bag

Preheat oven to 400 degrees.

In a large bowl or stand mixer, mix flour, baking powder, baking soda, dry spices and sugar (if you have a sifter, I recommend sifting all ingredients but the sugar). 

Melt butter in the microwave or on stovetop and stir in the freshly grated ginger while the butter is still warm. Set aside.

Stir buttermilk, eggs and maple syrup together in a bowl and then pour into dry mix. Mix with an electric mixer or stand mixer until ingredients are loosely incorporated. Add melted butter and continue to mix until all ingredients are completely incorporated into a batter.

Fill ziplock bag with batter and snip a 1/2 opening at one corner. Pipe the batter into the donut pan, filling each mold only about halfway (these donuts rise a lot). If you happen to have a donut pan that is not non-stick, grease the molds or spray with cooking spray before filling.

Bake at 400 degrees for 5-6 minutes. Empty the tin and repeat. Let donuts cool before icing.
This recipe would also work for a full-sized donut pan, just make a larger cut in the ziplock bag and increase cooking time by 3-4 minutes.

Icing
2 cups powdered sugar
orange juice (fresh squeezed if you have an orange!)
1/4 tsp. orange extract
red and yellow food coloring (optional)

Start by adding 1 tbs. of orange juice to the sugar and stirring. Continue to slowly add juice and stir well until the sugar is the consistency of syrup. It should stick to your whisk or spoon. If you go too far, just add more sugar. Add orange extract.

Coloring: Liquid food coloring is very powerful. If you want a bright shade of orange add 1 drop of red and 5 drops of yellow to the icing and stir. If you want a pale orange, take a small amount of the icing (maybe a tablespoon) and put it in a separate bowl. Add food coloring to the small bit of icing. Then spoon little bits of the colored icing back into the main batch until you have the desired color.

Icing: Using your fingers, dip the top half (whichever half of the donut you want to cover up) of each donut into the icing halfway. Twist the donut as you remove it from the icing and set on a drying rack or paper towel to let the icing harden. Donuts stay fresh for at least one night in the refrigerator.


Monday, March 28, 2011

Sweet Onion & Broccoli Soup

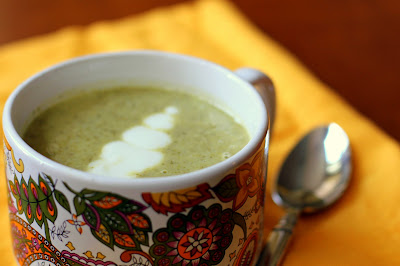
If you served me this soup in a restaurant and told me that it wasn’t cream based, I’m not sure if I would believe you. It is so rich and delicious, that I am literally surprised every time I taste it that such plain ingredients can come together to make something so flavorful. Forgive me for the corporate buzzword, friends, but I’m gonna go ahead and call this vegetable synergy. Jazz haaaaannnnds.
In my house, broccoli has a bum rap. When I make it, Travis treats me like a perfume girl at a department store. Kt: “Can I interest you in some grilled broccoli this evening?” Travis, smiling politely while remaining at least two arm-lengths away: “Broccoli? Oh, not today, thanks.” Though he really means not ever; find someone else to hock your smelly broccoli to, lady. And if I’m cooking broccoli in the house, he inevitably announces that I must be making broccoli. I can only assume this is a warning cry for the neighbors, because, uh, clearly it’s not news to me that I’m cooking broccoli.

He’s not the only one though. I’ve heard, “I don’t eat broccoli because it make me gassy,” or “it’s too hard on my digestive system” (the timeless euphemism for “it makes me sh*t bricks”). Who cares? So do lots of other things and you eat them anyway. The thing is, people know that broccoli is good for them, so I’m not sure where the resistance comes from. I mean, one article on the benefits of chia seeds or pomegranite juice and people will down the stuff like there’s no tomorrow. But what about our old tried and true vegetable friends that have long been superfoods?! EAT SOME BROCCOLI, for crying out loud! (Perhaps I am overly sensitive because my eating partner doesn’t share my love for the mini trees of life, but all the same, I will continue with my public crusade.)
Most of the time I eat my broccoli raw or grilled. But I recently had some broccoli that was on its way out in the freshness department, so I decided to try my hand at making broccoli soup. V8 makes a Garden Broccoli soup that I really like (and will still eat if I need a quick soup), but it has a fair number of chemical-sounding ingredients. I liked the idea of making my own broccoli soup with just a few ingredients and avoiding wasted broccoli all at the same time. I know, I'm like some sort of superhero, right? 

Full disclosure: broccoli loses a lot of its nutrition when boiled. But it also loses nutrition when it sits in your fridge for a long time. So broccoli that’s already gone limp is a fine choice for blending up in some soup. I think you will be really shocked at how good veggies and lemon juice can taste when cooked and pureed. I don't know if I'll ever make Travis a broccoli lover, but I think this soup is a step in the right direction.


Sweet Onion & Broccoli Soup

Makes 4 servings

2 large crowns of broccoli
2 tbs. olive oil
1/2 medium-large onion, diced
1 jalapeno, diced 
2 cloves garlic, minced or crushed
2 cups vegetable stock
juice from 1 lemon
crushed bay leaves (5-6 good shakes or 1/2 tsp.)
thyme (5-6 good shakes or 1/2 tsp.)
salt and pepper to taste

Required: blender or immersion blender.

Cut broccoli crowns into florets, discarding the stalk. Boil broccoli florets until tender, roughly 15-20 minutes. You should be able to break up the pieces with a spoon, but you don't want the florets to start separating on their own. Drain broccoli and set aside.

Heat 2 tablespoons of olive oil in a medium-sized pot. Add onions and jalapeno and cook over medium heat for 5-7 minutes, stirring often. Add garlic and cook for 5 more minutes.  Feel free to add more olive oil if needed to prevent onions from burning.

Add vegetable stock, lemon juice, crushed bay leaves, thyme, salt and pepper. (If you don't have crushed bay leaves, 2 whole bay leaves would work as well.) Give a quick stir to incorporate all ingredients. Add broccoli (the stock will not cover all the broccoli at this point)and let cook covered for 15-20 minutes.

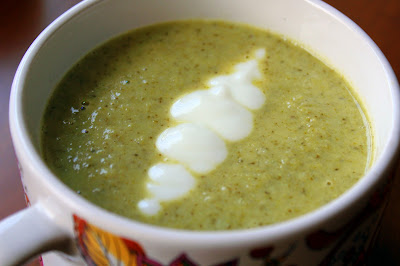
Broccoli should be very tender and starting to break up on its own. Using a stirring spoon or spatula, break up the broccoli florets so that all broccoli is submerged in the stock. The photo above shows this phase. Remove soup from heat.

If using an immersion blender (which I don't have), proceed to blend. If using a regular blender, pour the contents of the soup into the blender pitcher and let cool for 5 to 10 minutes. Then carefully blend until smooth, pausing often to let steam out.

When using a regular blender it's probably best to let the soup cool for a full 15 to 20 minutes, blend, and then place back on the stove for 10 minutes to heat back up. But in the 4 times I've made this soup, I haven't had the patience for that. When working with hot soup, just proceed slowly with the blending process and make sure to let steam out of the blender often.

Also, keep in mind the limitations of a blender size should you want to double the recipe. A standard blender is not equipped to hold more than 1 batch of this soup at a time.

Serve with avocado slices or a dollop of plain yogurt.

Wednesday, March 9, 2011

Sweet Potato Quinoa Granola Bars and Thumbs-Up Running

I'm a thumbs-up runner. And that doesn't mean I'm so excited to be running that I throw thumbs-up signals to everyone else on the streets (though I'm known for an occasional high-five). It means that my hands naturally get into stiff little thumbs-up positions while I run, which, if you test it out right now, you'll discover requires some effort by your muscles. Go ahead - bend your elbows at your sides and look at the natural position of your hands. Then see how many muscles you have to use to form a thumbs-up. Newsflash: while they may put a smile on someone's face, thumbs-up don't make you any faster or more efficient.

I bring this to your attention, not so you that can spot me in a race, but so that next time you're running (or biking or rollerblading or moon bouncing) you stop to think about your body position and any unnecessary energy you might be expending on tense muscles. Take five seconds to consider the muscles that are flexed and whether they are actually helping you with your activity. If not, make an effort to shake em out every once in awhile.

Though I can't stop myself from thumbs-upping completely, now that I'm aware of it, I can release the tension in my hands and wrists when I think of it and give my body a break from spending needless energy keeping my fingers tight and my thumbs up. That way, more of my kcals can go towards getting me from point A to point B.  
After this past weekend's rain-riddled, thumbs-up run (with plenty of conscious hand relaxation!), I came home and I really wanted some calories. In my body. Stat. Enter sweet potato quinoa granola bars. A delightful blend of carbs, fiber and protein. If I had to compare them to a commercial product, I would say they are most like Larabars in consistency. I haven't come across a Larabar that uses oats or grains (or whatever mysterious family quinoa is in), so nutritionally, they aren't the same. But these bars have a fruit-chewy bite to them, rather than the crispy-chewy feel of regular packaged granola bars. I will call mine Katibars.

Sweet potato quinoa bars would be great to bring on a long bike ride or hike. Between the fruit, sweet potato puree and agave syrup, the sugar content is high; and the nuts and quinoa provide some protein. The fiber content is also high from the oats and quinoa, so be conscious of what your body is used to while working out.


Side note: when I was studying for the bar exam, I signed up for pottery class as a stress-relieving, extra-curricular activity. In my head I imagined throwing serving bowls and two-foot vases; Christmas gifts galore! In reality, I ended up with boatloads of condiment bowls and a rough, rough, cream pitcher. So I'm giving them some mileage on this blog. Hence the photo of just a bowl. Thx for indulging.

Sweet Potato Quinoa Granola Bars

Makes 12 bars

2.5 cups old fashioned oats
1/4 tsp. nutmeg
1/8 tsp. ginger
1/8 tsp. cloves
1 tsp. cinnamon
1/2 tsp. salt
1 tsp. vanilla
1 cup sweet potato puree
1/2 cup agave syrup
1/2 cup uncooked quinoa
1 cup roughly chopped nuts (I used half pecans, half almonds)  
1/2 cup dried cranberries

Preheat oven to 325 degrees. Toast the uncooked quinoa on the stove in a wide pan over low heat, 8-10 minutes, stirring often (quinoa grains will pop in the pan). Mix oats, spices, and salt together in a large bowl. In a separate bowl, stir together sweet potato puree, vanilla and agave. Add wet mix to oat mix, making sure that all oats are moistened. Stir in quinoa, nuts and cranberries.

Line an 8" or 9" square pan with one piece of parchment paper so that the edges of the parchment paper hang over two opposite edges of the pan (so that you can lift the bars out of the pan after baking). Press granola mix into the lined pan.

Tip: to press the granola evenly into the pan, spread mixture around and cover top with wax paper. Then use a smaller pan or heavy square/rectangular item to press down on the wax paper. Repeat this process over all of the granola until even.

Bake at 325 for 22-25 minutes. Let granola cool in pan; remove for easy cutting. Then enjoy your own [name]bars.

Sunday, February 27, 2011

Cran-Orange Buckwheat Muffin Nirvana

Last week, I attained nirvana in two forms: swooshing down the slopes of Winter Park, CO and eating these muffins. I'm not sure which was better. Colorado had mountains and beer and good friends . . . but the muffins had fresh cranberries! And orange zest! And if I looked at them long enough, they would tell me jokes! That's like being with friends, no? 
Seriously, though, these muffs were tight - er, delish. High in fiber, bursting with fresh fruit, and relatively low in sugar (and can be dairy free if you stick with just oil). Despite the fact that this blog might be what you call sugar-heavy, I try not to use sugar needlessly. Sure, I use gobs of confectioners sugar in my frosting (though less than most standard recipes or anything you would find on a grocery store shelf), because let's face it, if you're eating frosting, ya ain't tryin' to cut down on your sugar. At least not for that particular indulgence. But when it comes to something like a muffin, why use more sugar than you need to?

A standard muffin recipe is for twelve muffins. I routinely see recipes calling for 2/3, 3/4 or even 1 cup of sugar. This is more than you need! Depending on the recipe, it might be for a large volume of batter (even if it says only 12 muffins), in which case you can either make ginormo muffins or 18-24 normal-sized guys. In that case, maybe the additional sugar is warranted. But for your regular twelve-slot tin, with muffins that bake up one or two centimeters above the rim, 1/3 to 1/2 cup of sugar per batch is plenty.
 
In case you haven't noticed, I love me some fruits in my baked goods, which helps to naturally sweeten things. In this recipe, even with supertart cranberries, 1/3 cup of sugar was enough to balance out the tartness and sweeten the muffins. And if you're baking muffins with a sweeter fruit, like apples, blueberries or (especially) bananas, 1/3 cup of sugar will definitely be fine. If you're making a straight bran muffin or maybe a lemon-poppy seed, you might want to up the sugar to 1/2 cup. I've found that you can cut the sugar in a recipe without making any other changes. So if you see a good recipe that calls for more sugar than you need, take liberties with your sweetener.

But Kaaaaatie, what if I like a reallllly want a sweet muffin? Then quit your whining and go eat a cupcake, because a muffin's not what you're looking for. Kidding. If you want to make a batch of sweet-treat muffins, use your sugar where it counts - on top. Your taste buds will get more bang for their buck with a sprinkling of sugar on top of each muffin than if you were to add twice as much directly into the batter (this is a great tip for those who like sweet cornbread - skip the honey or sugar in the mix and sprinkle the top with a few pinches of raw sugar). For a crumb topping, mix 3 tablespoons of brown sugar with 1 tablespoon of melted butter and distribute evenly over muffins.
 

And for kicks, here are some pics of my other nirvana. These are the good friends:
  

 This is me and the mountain (don't worry- it didn't take me down every time):

. . . and these are the beers!

Cran-Orange Buckwheat Muffins

Makes 12 muffins

3/4 cups buckwheat flour
1-1/4 cups whole wheat pastry flour
1/3 cup sugar
1/4 cup ground blueberry flaxseed (optional)
2 tsp. baking powder
1/2 tsp. baking soda
1/2 tsp. salt
1 cup orange juice
1/4 cup canola oil
1/4 plain nonfat yogurt (or another 1/4 cup of oil)
2 tbs. orange zest
2 tsp. vanilla extract
1-1/2 cups fresh cranberries (or frozen and thawed)

Preheat oven to 375 degrees. Mix all ingredients well, adding cranberries last. Fill cups of a standard muffin tin 3/4 full. Bake for 23-27 minutes. Find your own nirvana.

Friday, February 18, 2011

Love Your Heart: Spicy Polenta Chips w/Roasted Red Pepper Dip (low-sodium)


If there's one thing I like, it's a challenge. So when my friend Sarah R.C. suggested that I check out Sodium Girl's website and participate in her Love Your Heart Recipe Rally, I said, sign. me. up. But seriously, making a low sodium dish? That didn't even sound like a challenge, more like just a new theme for a post. Boy did I get a double dose of sodium reality. Cutting out the Na is hard, folks.

"Sodium Girl" Jess was diagnosed with Lupus in 2004 and has since had to severely curtail the sodium in her diet. But she hasn't let that stop her from eating delish foods everyday (or so it appears from her posts). You can read her story here. In honor of National Heart Health Month, Jess organized the Love Your Heart Recipe Rally to bring bloggers together in posting heart-healthy, low-sodium recipes. 

The parameters for the Rally were to pick a typically salty dish that you love, identify the ingredients that are high in sodium and then craft a low-sodium alternative recipe. The goal was to keep each serving under 40mg of sodium. Now, if you, like me, have never monitored your sodium intake, that number means nothing to you. To put it into perspective, the average American takes in more than 3,400mg of sodium per day.*

Oy. And I'm supposed to make something tasty with less than 40mg/serving? More challenging than I thought.

*The USDA has recently recommended limiting that intake to 1,500mg to 2,300mg per day, depending on your age and other health factors. Check out the USDA's new key recommendations for what we should be ingesting each day.
For my Rally recipe, I chose the classic salty snack of chips & dip. Here is your typical sodium intake after one serving of chips & dip:

Potato Chips & Onion Dip
  • 1 oz. Lay's Classic Potato Chips - 170mg (Baked Lay's - 180mg)
  • 2 tbs of Dean's French Onion Dip - 170mg
    •  Total - 340mg
Tortilla Chips & Salsa
  • 1 oz. Tostitos Hint of Lime Tortilla Chips (my fave) - 160mg
  • 2 tbs of Tostitos Medium Chunky Salsa - 250mg
    • Total - 410mg 
Let's get to work.
For my take on the chips, I decided to do a homemade "frito" with yellow corn grits. Corn grits, also known as polenta, are like cornmeal, but more coarsely ground. Any store that sells Bob's Red Mill products should carry the grits. And for the dip, I wanted something creamy - akin to southwestern ranch. Since I love red pepper hummus, a roasted red pepper seemed like the perfect sodium-free route to flavor in my dip. 

If you've never roasted your own peppers before, do it. Now. With this recipe. It's a really cool process and it feels good to go from a fresh veggie to a healthy, tasty dip.
Like I said, I've never paid close attention to how much sodium is in my diet. I could probably tell you down to the calorie the breakdown of fats, protein and carbs, the fiber content and the sugar levels of most things I eat. But sodium? No sé. Initially, I kind of thought I could process a pepper and some lowfat yogurt or sour cream and BOOM, I'd have an awesome dip. Not so much. When I first tasted the pepper puree mixed with sour cream and a dash of chili pepper, I was bummed at how bland it was. :( I looked through my cupboards and everything I wanted to add was chock-full o'sodium. Hot cherry peppers in a jar, sliced jalapenos, canned green chilies, white beans - sodium, sodium, sodium!

And adding even a smidge of salt to the dip was out of the question. One teaspoon of table salt contains 2,300mg of sodium. So even if I sprinkled in a scant 1/16 teaspoon of salt (a few shakes or grinds), I would have been adding over 140mg of sodium to the two-serving dip, which would blow my 40mg/serving limit.

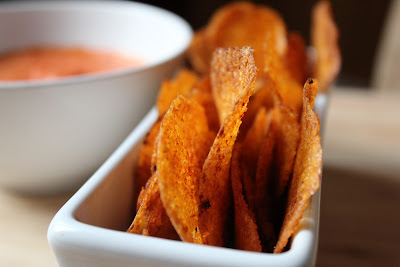
After poking around Jess's site, I decided that vinegar might give the dip the tang I was looking for - and it did! That and some cumin and I was starting to have the semblance of a dip worthy of my chips (which came out awesome by the way - the trick is to spread the corn mixture as thinly as possible before baking).
While I have no intention of going sodium crazy and cutting out all the salt in my life, this exercise opened my eyes to a part of my diet that I was paying zero attention to. Previously, I wouldn't have given any thought to whether I put two grinds of salt or four into my eggs. Only now do I realize how much each grind counts! And I discovered that all of my flavor go-tos were in cans or jars (and thus rife with added sodium). Maybe I'm getting more sodium than I thought and maybe it's time to pay a bit more attention to how I flavor my foods.

On Tuesday, the Washington Post published a timely article with the tagline, "How hard is it to reduce your salt?" According to staff writer Tim Carman, who went low-so for one week, very. I think he wanted to bath in canned soup after every salt-deprived meal. Carman's approach may have been a bit aggressive based on his admitted predilection for salty foods, but his overall result was positive: increased awareness of sodium levels and identification of a few nutritional gaps in his diet. Mr. Carman and I both learned a lot this week.

Thanks to Jess for the healthy inspiration! Links to the other Rally recipes will be available on Sodium Girl today, along with Jess's arsenal of low-sodium tips and meal suggestions.
And with that, I give you my Love Your Heart recipe. Here's to healthy ticking.

Spicy Polenta Chips

Makes around 36 chips; serves 2

-1/2 cup polenta (aka corn grits)
-1/2 tsp. chipotle chili pepper (choose any sodium free ground chili powder; I used McCormick Chipotle Chili Pepper)
-3/4 cups boiling water
-1 tsp. olive oil
-paprika

Preheat oven to 450 degrees. Mix polenta and chili powder in a bowl. Add boiling water and olive oil, stirring well. Wait a few minutes to allow the corn to absorb the water. Spoon 1/2 teaspoon to 1 teaspoon-sized dollops of mix onto a parchment lined cookie sheet. Using the back of a spoon, spread the corn mix into a disk as thinly as possible without having big holes. Sprinkle chips with paprika. Cook the chips at 450 for 10-11 minutes or until they start to brown and lift up at the edges.

Nutrition (per serving): 10mg sodium, 150 calories, 2.5g fat, 1g saturated fat, 27g carbs, 1g fiber, 1.5g protein

Roasted Red Pepper Dip

Makes 1 cup; serves 2

-1 red pepper, roasted, skinned and seeded
-1 tbs. vegetable oil
-1/4 cup low fat sour cream (check sodium content)
-1/2 tsp. chipotle chili pepper
-1/2 tsp. cumin
-2 tsp. good vinegar (I used a white balsamic)
-paprika

Set your oven to a high broil (or around 500 degree). Coat bell pepper in vegetable oil using a basting brush or your fingers. Because of the high cooking temperature, stick with vegetable or canola oil and not olive oil. Place whole pepper on its side in a pan and put in the oven. Rotate the pepper on its side a 1/4 turn every 3 to 5 minutes. You want the skin to get blackened, but not split open. Total roasting time should be 15-20 minutes, rotating as needed for an even char.

Remove pepper from the oven and place in bowl with a cover. Let pepper sit covered, steaming for 10-15 minutes. Once pepper is cool enough to handle, peel off the skin. Then pull off the stem and scrape out the seeds. Squeeze out any excess juice as you do so.

Slice the roasted pepper into 4 or 5 chunks, making sure to remove any blackened skin or seeds. Place roasted pepper chunks in a food processor and process for 30 seconds, scraping down the sides as needed. Let pepper puree sit until completely cooled. If any excess liquid collects, drain the puree.

Add sour cream, chili pepper, cumin and vinegar to the puree. Stir well or process for another 15 seconds. Refrigerate for at least an hour. Garnish with paprika. Enjoy with homemade spicy polenta chips.

Nutrition (per serving): 20mg sodium, 90 calories, 4g fat, 2g saturated fat, 20g carbs, 1g fiber, .5g protein
Related Posts Plugin for WordPress, Blogger...