Showing posts with label entrees. Show all posts

Monday, March 28, 2011

Sweet Onion & Broccoli Soup

If you served me this soup in a restaurant and told me that it wasn’t cream based, I’m not sure if I would believe you. It is so rich and delicious, that I am literally surprised every time I taste it that such plain ingredients can come together to make something so flavorful. Forgive me for the corporate buzzword, friends, but I’m gonna go ahead and call this vegetable synergy. Jazz haaaaannnnds.
In my house, broccoli has a bum rap. When I make it, Travis treats me like a perfume girl at a department store. Kt: “Can I interest you in some grilled broccoli this evening?” Travis, smiling politely while remaining at least two arm-lengths away: “Broccoli? Oh, not today, thanks.” Though he really means not ever; find someone else to hock your smelly broccoli to, lady. And if I’m cooking broccoli in the house, he inevitably announces that I must be making broccoli. I can only assume this is a warning cry for the neighbors, because, uh, clearly it’s not news to me that I’m cooking broccoli.

He’s not the only one though. I’ve heard, “I don’t eat broccoli because it make me gassy,” or “it’s too hard on my digestive system” (the timeless euphemism for “it makes me sh*t bricks”). Who cares? So do lots of other things and you eat them anyway. The thing is, people know that broccoli is good for them, so I’m not sure where the resistance comes from. I mean, one article on the benefits of chia seeds or pomegranite juice and people will down the stuff like there’s no tomorrow. But what about our old tried and true vegetable friends that have long been superfoods?! EAT SOME BROCCOLI, for crying out loud! (Perhaps I am overly sensitive because my eating partner doesn’t share my love for the mini trees of life, but all the same, I will continue with my public crusade.)
Most of the time I eat my broccoli raw or grilled. But I recently had some broccoli that was on its way out in the freshness department, so I decided to try my hand at making broccoli soup. V8 makes a Garden Broccoli soup that I really like (and will still eat if I need a quick soup), but it has a fair number of chemical-sounding ingredients. I liked the idea of making my own broccoli soup with just a few ingredients and avoiding wasted broccoli all at the same time. I know, I'm like some sort of superhero, right? 

Full disclosure: broccoli loses a lot of its nutrition when boiled. But it also loses nutrition when it sits in your fridge for a long time. So broccoli that’s already gone limp is a fine choice for blending up in some soup. I think you will be really shocked at how good veggies and lemon juice can taste when cooked and pureed. I don't know if I'll ever make Travis a broccoli lover, but I think this soup is a step in the right direction.


Sweet Onion & Broccoli Soup

Makes 4 servings

2 large crowns of broccoli
2 tbs. olive oil
1/2 medium-large onion, diced
1 jalapeno, diced 
2 cloves garlic, minced or crushed
2 cups vegetable stock
juice from 1 lemon
crushed bay leaves (5-6 good shakes or 1/2 tsp.)
thyme (5-6 good shakes or 1/2 tsp.)
salt and pepper to taste

Required: blender or immersion blender.

Cut broccoli crowns into florets, discarding the stalk. Boil broccoli florets until tender, roughly 15-20 minutes. You should be able to break up the pieces with a spoon, but you don't want the florets to start separating on their own. Drain broccoli and set aside.

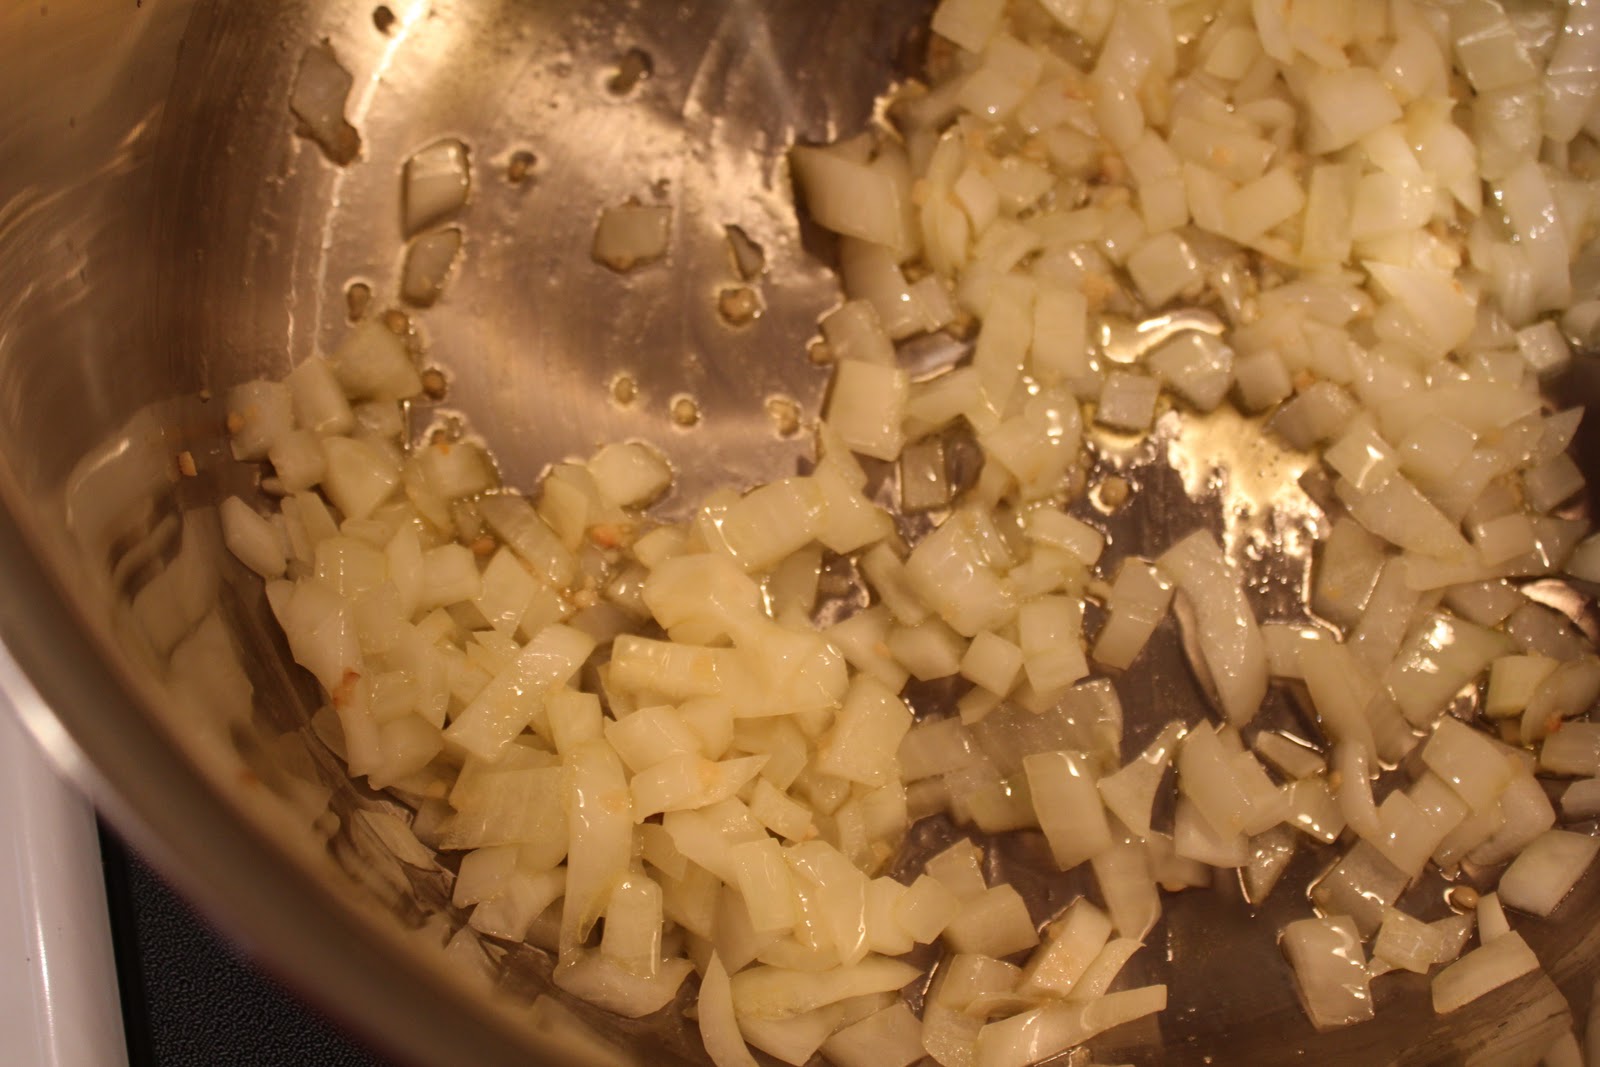
Heat 2 tablespoons of olive oil in a medium-sized pot. Add onions and jalapeno and cook over medium heat for 5-7 minutes, stirring often. Add garlic and cook for 5 more minutes.  Feel free to add more olive oil if needed to prevent onions from burning.

Add vegetable stock, lemon juice, crushed bay leaves, thyme, salt and pepper. (If you don't have crushed bay leaves, 2 whole bay leaves would work as well.) Give a quick stir to incorporate all ingredients. Add broccoli (the stock will not cover all the broccoli at this point)and let cook covered for 15-20 minutes.

Broccoli should be very tender and starting to break up on its own. Using a stirring spoon or spatula, break up the broccoli florets so that all broccoli is submerged in the stock. The photo above shows this phase. Remove soup from heat.

If using an immersion blender (which I don't have), proceed to blend. If using a regular blender, pour the contents of the soup into the blender pitcher and let cool for 5 to 10 minutes. Then carefully blend until smooth, pausing often to let steam out.

When using a regular blender it's probably best to let the soup cool for a full 15 to 20 minutes, blend, and then place back on the stove for 10 minutes to heat back up. But in the 4 times I've made this soup, I haven't had the patience for that. When working with hot soup, just proceed slowly with the blending process and make sure to let steam out of the blender often.

Also, keep in mind the limitations of a blender size should you want to double the recipe. A standard blender is not equipped to hold more than 1 batch of this soup at a time.

Serve with avocado slices or a dollop of plain yogurt.

Monday, December 27, 2010

Cupboard Mac & Cheese with Brie, Fontina, Goat and Cheddar


I hate wasting food. A lot. I think sometimes Travis is appalled by my attempts to salvage food in our house when, ahem, perhaps a bit too much time has gone by. But groceries are so expensive in DC, I just can't stand not using them. 

For various reasons (holiday entertaining; my own weakness at fancy cheese counters), we had several partial blocks of really good cheese left in our fridge that I knew weren't going to get eaten. So when it was time to cook something for an afternoon Christmas get-together, I decided that I would try to make mac & cheese using the items I already had in my house, namely the aforementioned cheese.

The bulk of the cheese we had was brie and fontina, neither of which is typically used in baked macaroni and cheese. They are both mild and on the sweet end of the cheese spectrum (at least, the generic, unaged versions), whereas most mac & cheese recipes call for stronger, sharper cheeses (e.g., cheddar, Monterey Jack, Parmigiano-Reggiano). My mom always told me that a really good cheese will make your toes curl, but I think that only applies to sharp cheeses. A delicious brie might make your heart flutter, but it won't curl your toes. So I knew I would need to dress the cheeses up with a little something extra. Like my favorite white wine and some fresh rosemary.


Be aware that even though I dressed it up with rosemary and wine, this is a mild dish that is not super rich. I have a recipe for a very decadent mac & cheese that calls for no less than 1 quart of whole milk or cream and 6 tablespoons of butter - this is not that mac & cheese. But it is a really delicious recipe if you are looking for a lighter flavored, but still comforting macaroni. 

I brought the mac & cheese as a side dish for a hearty chili dinner with some of Travis's friends from grad school, which the host, Jenny, affectionately refers to as the "Michigan Family." (Her kids are in fact the first children to ever call me an "auntie"!) The Michigan Family recently got a new addition, baby Logan (he's the redheaded cutie with Angelina Jolie lips below), so we had lots to celebrate! 

Among other things to celebrate at the close of this year was the end of Jenny's countless surgeries as a result of a double mastectomy and subsequent reconstruction. She is a two-time breast cancer survivor and has the most amazing attitude you can imagine. At one point over dinner, she recounted the Single Girls' Apple Pie, and jokingly said "What does it take to get a blog entry about my tragedy?!" I'm working on something good, girlfriend.


And because the growing brood of kiddos really adds to the flavor of a Michigan Family gathering, I couldn't resist sharing a few photos. This is the face of a kid who is not interested in mac & cheese until he has downed some chocolate.

This is also the face of a kid who is not interested in mac & cheese. Because he has no teeth. Look at that little mouth - it doesn't get any cuter.

This one's a future blogger. She had some thoughts on my content.

And this one schooled me in grammar.

I've called this dish "cupboard" mac & cheese to encourage you to make use of whatever pasta/herbs/cheeses and half bottles of wine you've got around your house. I promise, you can't screw up noodles baked in melty cheese and good wine.

Cupboard Mac & Cheese

Serves 8-10 as a side
  • 12 oz. pasta of your choice (suggested: rotini, fusilli, or gemelli)
  • 1 large or 2 small slices whole wheat sandwich bread
  • 1/3 cup walnuts and/or pecans (if you want to skip the homemade breadcrumbs, swap in 1/2 cup bread crumbs for the sandwich bread, nuts and 1 tbs. butter)
  • 2 tbs. butter, divided (1 tbs./1 tbs.)
  • 1 tbs. olive oil
  • 2 cloves garlic, chopped
  • 1 tbs. chopped rosemary (fresh if you have it - we have a very overgrown rosemary bush in our yard)
  • 1/2 cup of your favorite white wine (I used Sauvignon Blanc)
  • 2 tbs. whole wheat flour 
  • 1 cup milk (I used skim)
  • 4 cups of shredded cheese (I used roughly 1 cup bleu goat cheese, 3/4 cups cheddar, 1-1/2 cups brie, 1-1/4 cups fontina)
  • 1 tsp. kosher salt
  • pepper to taste

Preheat oven to 350 degrees. Tear wheat bread into large chunks and place in a food processor; pulse several times until mostly crumbly. Add nuts and continue to process until ground into crumbs. Melt 1 tbs. of butter in a large skillet. Toss crumbs into skillet and toast for 5-7 minutes, stirring often. Or, use pre-made breadcrumbs as noted above.

Cook pasta according to directions for al dente consistency. Usually 8-10 minutes. Drain and set aside.

Heat up olive oil and 1 tbs. butter in a large pot. (If you have an oven-safe pot, use it, so that you can go directly from stovetop to oven.) Saute chopped garlic and rosemary in the hot butter/oil for 2-3 minutes at medium heat. Reduce heat and slowly add wine (turn on your fan, because it will smoke a little). Let the wine heat up and then add flour. Turn heat back up to medium and stir until the mixture thickens. Add milk and stir for a few more minutes. Add cheese, salt and pepper; stir until melted. Add cooked pasta and stir.

Top with toasted breadcrumb mix. Bake for 30-35 minutes.

Monday, November 29, 2010

Mexican Hominy Lime Soup, Olé

(I didn’t get many pictures of the cooking process, but I couldn’t deny readers this recipe because it is SO YUMMY.) 

Exactly one year ago from yesterday, I was in Cozumel, Mexico cheering on my BFF Travis in his first Ironman triathlon (congrats to all of the 2010 finishers!). Spectating at an Ironman is no small feat. It involves anywhere from 10-17 hours (in this case, 12) of running around in the heat trying to catch a 5 second glimpse of your racer. But believe me, your racer needs those 5 seconds, so you just do it. As spectating locations go, however, I certainly can’t complain about Cozumel. I was lucky enough to get a tropical vacation out of the deal (other popular Ironman locales include Kentucky and Idaho). 

As part of this vacation, we rented a condo with our parents and hired a local cook to come in and prepare our meals. Sounds so lavish, right?! It was actually much cheaper than eating out every night and so much more delicious than making our own food. Our cook, Sylvia, was amazing (e-mail me if you're ever in the Yucatán neighborhood and looking for a cook). My dad ate so much, I thought we might have to get his stomach pumped - which would not have been my first time in a Mexican hospital (story for another day). 


One of my family's favorite dishes was a super-spicy chicken soup. Unfortunately, between our zero knowledge of Spanish and Sylvia’s minimal English, we never really found out what else was in the soup. I recently came across a Martha Stewart recipe for Green-Chile Pozole, which kind of resembled Sylvia's homemade spicy soup and as I was home visiting my parents, I thought I would treat them to a little reminder of Mexico. And since it was two days after Thanksgiving, it was the perfect opportunity to use our leftover turkey bits.

"Pozole" or "posole" describes a traditional kind of Mexican soup made with corn and meat. The Martha Stewart recipe called for a number of ingredients that were not readily accessible, so I concocted a simplified version that used the same key ingredient: hominy. Hominy is dried kernels of corn that have been boiled in water and soaked in lime until they swell, so that the hulls and germs can be removed. You might find ground hominy, especially in the south, but for this pozole, you want whole hominy or "big" hominy (the soaked kernels resemble chickpeas in size and texture). If your grocery store has an international aisle, check there first. Otherwise, look near the canned beans and veggies.

My pozole ended up tasting different from Sylvia's beloved soup, but I daresay . . . it was equally good. It lacked the extreme spiciness (because I didn't use habaneros, only jalapeños), but the flavor was incredible. When I took the lid off the pot after a couple hours on the stove, it had that smell that you can only find in a really good Mexican restaurant (sweet and spicy and limaliscious). If you like real Mexican food, you have GOT to make this dish. Garnish with diced jalapenos, fresh avocado, feta or cotija cheese, and extra lime slices for squeezing.


If you want to do a vegetarian version, just swap out the chicken stock for vegetable stock, skip the meat, and use 2 onions and 2 cans of hominy.

Mexican Hominy Lime Soup

Serves 5-6 as a main course

olive oil
1 medium white or Spanish onion
4 cloves of garlic, chopped
1 jalapeño, seeded and diced
64 oz. (2 qts.) chicken stock
1 15 oz. can of hominy, drained but not rinsed
1 tbs. oregano (use Mexican oregano if you happen to have it)
juice from 3 limes
1 bunch of cilantro
1 small can of diced green chilies
a few shakes of salt
12-16 oz. cooked, shredded chicken or turkey

Suggested garnishes
extra diced jalapeños
sliced avocado
crumbled feta cheese or cotija cheese
extra lime wedges for squeezing
tortilla chips

Prepare cilantro by rinsing the leaves thoroughly and chopping off the top 3 to 4 inches of the bunch (discard the bottom or save for other use). Roughly chop the leaves and stems and set aside (should be around a cup of chopped cilantro). 

Heat 3-4 tbs. of olive oil in a large stockpot over medium heat. Slice onion and add to pot. Cook onions for 5-6 minutes, adding oil as needed to keep the onions from burning. Add jalapeños and garlic and cook for another 2-3 minutes.

Add chicken stock, hominy, oregano, lime juice, cilantro, chilies, salt and meat. Reduce heat to low. Cook for at least one hour on low heat, stirring occasionally. Most delicious if cooked for 3-4 hours.

Sunday, October 3, 2010

Curried Chickpea and Roasted Butternut Squash for Champions


Last weekend, I arm wrestled a large, angry roller derby girl who was so aggressive, she was foaming at the mouth (truth: she was large, but actually quite congenial and definitely not foaming at the mouth). It was a hard-fought battle. 
 
Said arm-wrestling took place at the annual H Street Festival in a rapidly-gentrifying section of Northeast DC known as the Atlas District. Over the past few years and up until about a year ago, H Street, NE had developed an enclave of cool, kitschy bars that attracted a modest but healthy crowd (gems: Palace of Wonders, Granville Moore’s). Very recently, however, shops and restaurants have started springing up in every lot between 8th and 14th Streets. As a result, the festival was CROW. DED.  In a good way. In a diverse way. The way that reminds you that you really are part of a giant city with millions of people who live their lives in all sorts of awesomely different ways (because sometimes DC can feel empty, like downtown on weekends, and buttoned-up, like my office everyday). 


Participating in the festivities were the DC Roller Girls. For $1, you had your choice of Roller Girl to arm wrestle (unfortunate: somehow I got hosed into picking the RG that hadn’t been picked to wrestle anyone yet...ummm, for a reason). But I was undeterred. Earlier that day, I had prepared - and snacked on - my absolute fave salad of roasted butternut squash and chickpeas for a post-festival BBQ at my friend Joe’s. Joe very presciently invested in a home near burgeoning H Street about a year ago. Butternut squash is colorful and fibrous and full of anti-oxidants (how could I lose, right?).

Wrong. Despite the power-squash and the many hours I’ve logged pumping iron (truth: zero hours logged pumping iron), I lost. Next time I’ll wear skates.


The best thing about this dish is that as long as you get good butternut squash, it doesn’t matter what spices you add, this dish will taste good. Swap out the curry for fresh cilantro and you have a tasty Latin dish. Use cardamom and cinnamon, and add a little soy milk or cream for a winter warmer. Yum.

                          
Curried Chickpea and Roasted Butternut Squash

2 cans chickpeas
2-3 cups fresh or frozen butternut squash (fresh is best!), cubed
1 medium yellow onion, diced
1 roma or 1/2 beefsteak tomato, diced
2 cloves garlic, minced
1/4 tsp. ginger
1/2 tsp. cayenne pepper
1-1/2 tsp. cumin
2 tsp. curry (I used yellow, but any curry works)
salt and pepper to taste
olive oil, lots
1/4 cup water

Preheat oven to 350 degrees.  Drain and rinse chickpeas; toss with olive oil until lightly coated.  Roast chickpeas for 10-15 minutes (remove when chickpeas start to split open). 

In a deep pan or stockpot, heat 3 tbs. of olive oil over medium heat and add diced onions.  Cook onions until soft.  Add garlic and cook for 3-5 more minutes.  Add squash and cook for another 15 minutes or until squash can be broken down with a spoon.  Add spices and 2 tbs. of oil and mash squash fully with spoon or potato masher (mash to whatever consistency you like; I like mine a little lumpy).  Add chickpeas and 1/4 cup water.  Mash chickpeas roughly. Finally, add tomatoes and stir to incorporate.
 
Feel free to add oil as needed throughout the cooking process. Serve in a pita, over greens or by itself. 

Serves 8-10 as a side dish or 4-6 as a main course. 


Related Posts Plugin for WordPress, Blogger...