Showing posts with label chocolate. Show all posts

Friday, December 17, 2010

Cookie Party v1.0 - Homemade Mint, Hazelnut & Vegan PB Oreos


As we've established, I'm a blogger now. Bloggers do weird things like be friends with each other even when they've never met. Weird, but also very sweet. As I learned this past weekend, Washington, D.C. has quite the cache of young, female bloggers who share a common interest in food, photography, healthy living, exercise and obsessive compulsive behavior (I kid . . . sortof). 

One such gal, Lisa, was very graciously opening her home to local bloggers for a cookie swap. My first thought: "That is so cool, I totally want to be a part of that! Gepetto, make me a real blogger!" My second thought: "Hold your horses, cowgirl, you don't know any of these people. Stick to what you know." I felt kind of like a weirdo inviting myself to a party at someone else's house where I wouldn't know another soul, buuuuuut, what the hell. I decided it would be good to get out and meet some new people.

I tried to explain the situation to a guy I work with, and it led to some second guessing:

       Katie: "Guys, I'm going to a party with other DC bloggers that I've never met to exchange cookies!"
       Co-worker: "Were you invited to this party?"
       K: "Not exactly."
       CW: "Do you know the host?"
       K: "Mmm, no."
       CW: "Are you going with some who knows the host?"
       K: "N-n-n-o-o." (Deflated voice; no more exclamation points.)
       CW: "Kathryn, will you know anyone at this party?"
       K: "No."
       CW: "I don't get it."
       K:  :(

And so, by the time the cookie party rolled around, I was feeling a little nervous. Maybe this really was a ridiculous idea. Plus I had caught cyberwind of what some of the other bloggers were making and was feeling inadequate. Originally, homemade oreos sounded so wonderful, but when I heard some of the fancy names of other cookies, oreos seemed kind of pedestrian. But at that point, I had all the ingredients for oreos plus two other events to prep for over the weekend. No time for changing plans.


Prepping for the party was kind of like getting ready for a first date. You don't know the person you're meeting, you want to make a good impression, you're crossing your fingers alcohol will be readily available and you try to plan for an easy exit in case it's a disaster. This, however, was a date with 20 other women. Way. More. Intense.

Fortunately, there was nothing intense about the situation at all. Everyone was amazingly nice and complimentary and funny. Most of the other people were in the same boat as me and didn't know any of the other guests. And it was really neat to talk to so many other bloggers.  

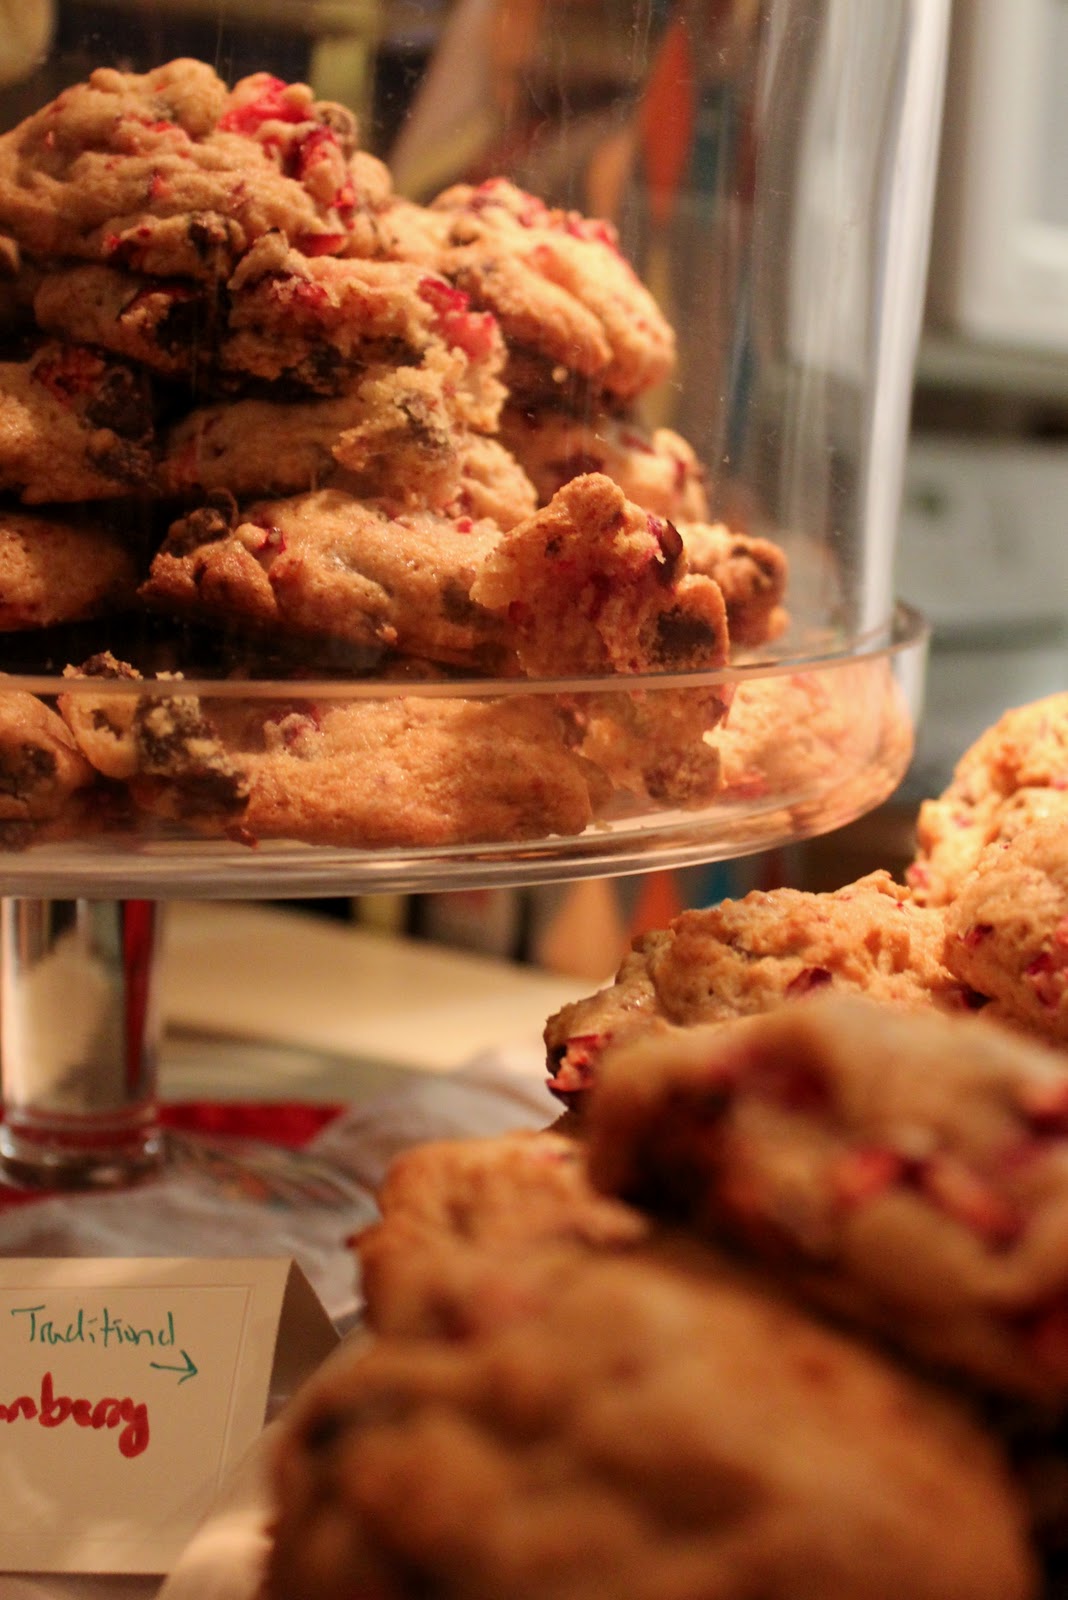
And the cookies, WHOA. Let's just say everyone brought their A game. I wish I had taken notes on who brought what, but see above re feelings of nervousness - I was not in a mental position to plan for note-taking. I do remember that Chase brought my absolute favorite kind of cookies, Italian pizelles (made without anise - not the traditional Italian method, but just the way I like them!). Clearly, we were instant friends.


Talk about crafty! These tree cookies were like little works of art.
I do remember that above and below were made by the host and co-host, Lisa and Emily. Both delish.

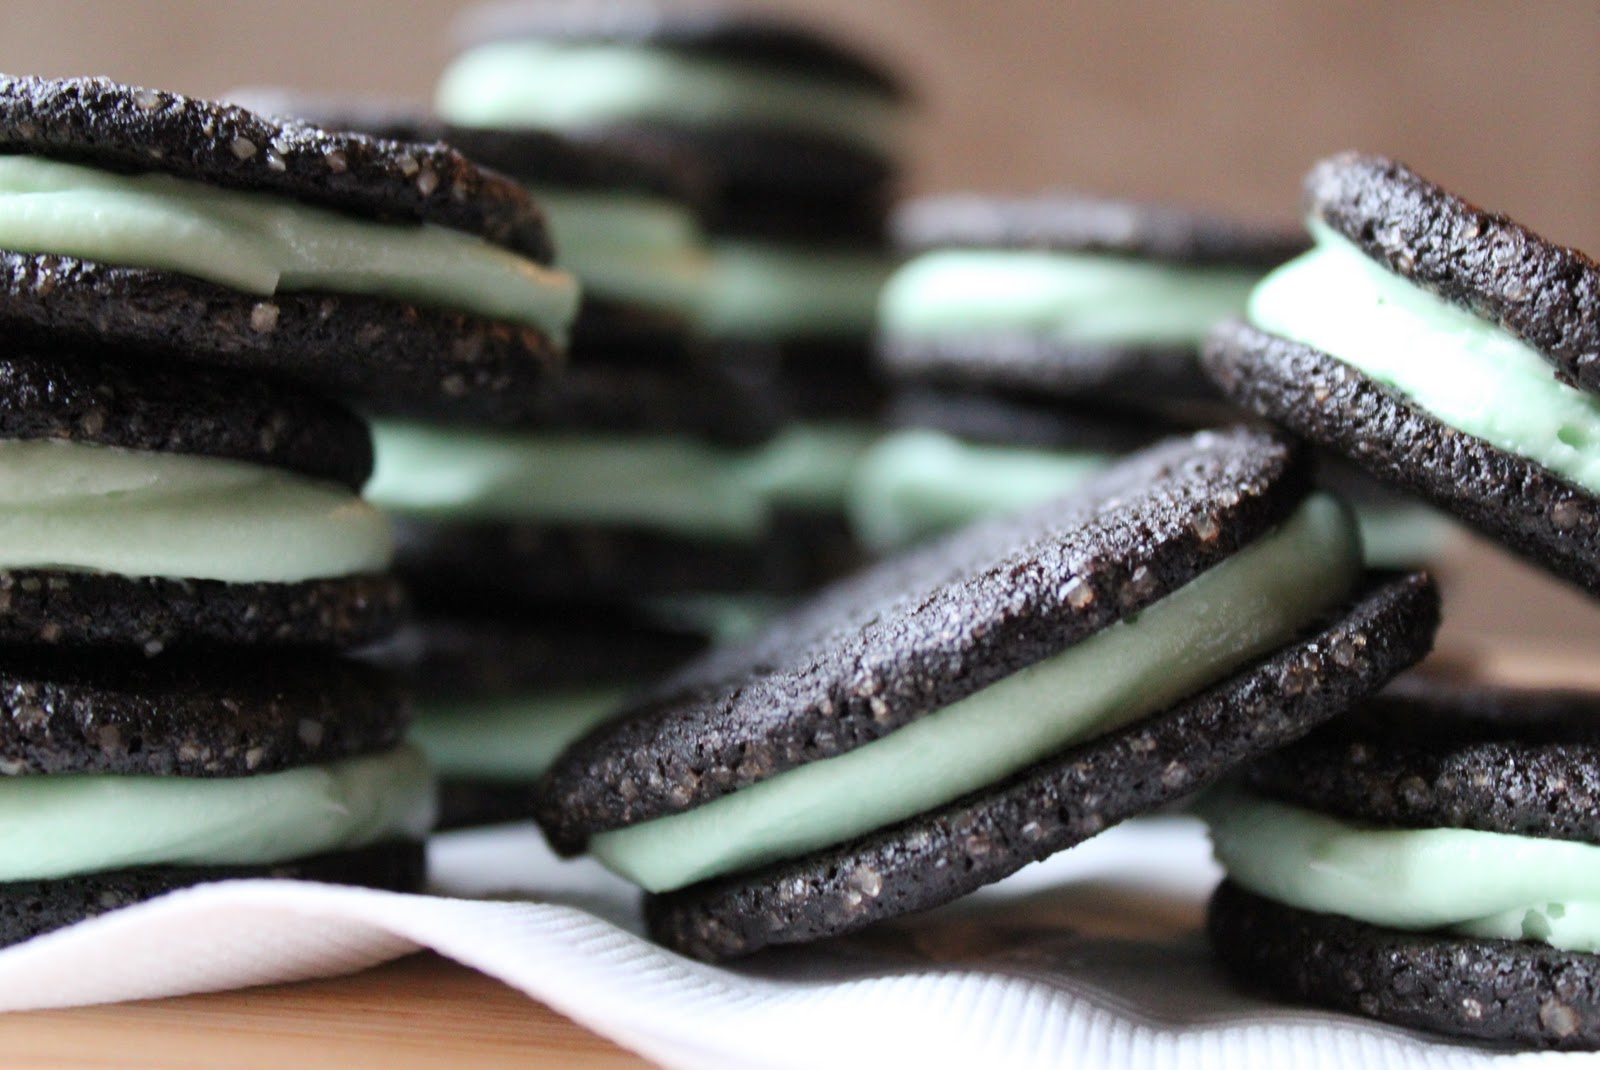
And for the record, my oreos were big hit (I think the pretty packaging helped). I served them at room temperature for the party, but these cookies are best eaten when frozen or thawed for 10 minutes or so (this also keeps the frosting from squishing out the sides when eaten).

*My apologies: I had originally posted the recipe for a very large batch of these wafer cookies, which makes a LOT of dough. More than my food processor can handle. Corrected measurements below.

Homemade Oreo Cookies

Makes 28-30 sandwich cookies

Chocolate wafers adapted from Smitten Kitchen's icebox cupcakes (vegan substitute ingredients in parens)

3/4 cups unbleached all-purpose flour
3/8 cup unsweetened cocoa powder (use dark cocoa if you can find it)
1/2 cup plus 1 tbs. sugar (v - vegan sugar)
1/8 tsp. salt

1/8 tsp. baking soda
7 tablespoons unsalted butter, slightly softened (v - Earth Balance Vegan Buttery Sticks or similar product)
4 tsp. milk (I used skim) (v - plain soy milk)
1/2 tsp. vanilla extract

turbinado or demerara sugar for rolling (v - vegan sugar)

Combine flour, cocoa, sugar, salt and baking soda in a food processor and pulse until mixed. Cut butter into chunks and add to processor. Pulse until incorporated (it will look like little chocolate crumbs). Mix the milk and vanilla together in a small bowl and add to the processor while pulsing. Continue to pulse or run the processor until the mixture forms a ball (keep pulsing, it will happen).

Roll the ball out into a log around 14 inches long. Roll the log in turbinado or other large sugar crystals until coated. Wrap the log in wax paper or foil and refrigerate for an hour or so (longer is fine; I left mine overnight).

Preheat oven to 350 degrees. Slice log into 1/4 inch thick slices and place on a baking sheet. The cookies will spread, so do not place too closely together. Bake for 10-11 minutes. Cookies should get crispy as they cool. 


Frostings:

A foreword on frosting: I do not measure frosting ingredients (though I do my best to provide estimates for you). For add-ins like hazelnut and peanut butter, I just add until tasty. I do the same with the powdered sugar. More sugar here would probably serve the purpose of making the frosting very thick, like real oreo creme, but I prefer the taste with less sugar. Also, if you are working with an organic powdered sugar, you really must sift the sugar or put it through a mesh strainer before using (for some reason the organic kinds are clumpier).

Each recipe below is enough for one batch of wafer cookies from above.

Hazelnut (this was so outrageously yummy)
6 tbs. butter
3 tbs. cream cheese
1/3 cup hazelnut spread, such as Nutella
2 to 3 cups powered sugar
splash milk
1/2 tsp. vanilla extract

Mix butter and cream cheese with a hand mixer. Add Nutella, milk and vanilla; mix. Blend in powdered sugar slowly.

Mint
See recipe from Mint Oreo Cupcakes. Divide batch in half.

Vegan Peanut Butter
1/2 cup (1 stick) Earth Balance Vegan Buttery Sticks
1/4 cup natural peanut butter (I like Smucker's because it is thicker than most brands)
2 to 3 cups powdered sugar
splash of soy milk
1/2 tsp. vanilla

Mix butter and peanut butter with a hand mixer. Add milk and vanilla; mix. Blend in powdered sugar slowly.

Assembly: Fill a quart sized ziplock bag with your frosting of choice and snip off 1/2 inch of the tip. Pipe generously onto one wafer cookie and top with a second wafer cookie. Serve after freezing or refrigerating.

Sunday, December 12, 2010

Mint Oreo Cupcakes and Uh, Laziness


Sooooo, I feel like we know each other pretty well now . . . and I feel like I can be honest with you all. The cupcakes pictured here are um, well, they're from a box. I wrote it really tiny because I'm ashamed. Like the little kid who whispers and turns away when he has to tell his parents that he flushed his brother's underwear down the toilet. I found myself baking at 11pm not once, but twice this week and I just didn't have the energy to bust out my measuring cups. Please don't judge me.

The thing is, they were so easy and delicious, I don't even regret it. If I want to make a fancy kind of cake, like something with fresh fruit, or if I'm baking something really special, I take pleasure in making a cake from scratch. Or if I want to experiment with a new kind of flour, I'm totally game for measuring ingredients until I'm blue in the face. But when the star of the show is really the homemade mint frosting and surprise cookie crust (coupled with the fact that my chance at getting more than 5 hours of sleep is getting smaller and smaller), I'm ok turning to a box. Organic food stores now have some good choices for boxed cake mix if you're concerned about ingredients. This girl, however, turned to Betty Crocker.

I made these cupcakes twice this week, once with red velvet cake mix and once with plain chocolate. The red velvet was definitely the winner. It tasted better with the cookie and the frosting (plus made a nice red and green theme for our holiday treats). I also tested out using a full oreo cookie in each cupcake versus twisting off the top wafer and just using one wafer plus icing. Using the full oreo was the clear winner.

Secret: if you want to wow your friends with cupcakes, just use a pastry bag for the frosting. Not only does it produce beautiful, evenly frosted cupcakes, it is SO FAST. I probably frosted 16 cupcakes in three minutes. Just do your best to avoid air bubbles in the pastry bag when filling it with frosting. I'm lucky enough to have a BFF that owns an amazing bake shop in NYC, CityCakes (if you live in the city, go there! Owner chefs Marc and Benny are nice and easy on the eyes), so I learned from the best. But it's not rocket science and I'm confident you too can make a perfectly frosted cupcake.

I used a standard Wilton brand pastry bag with a wide metal tip. If you don't have these tools, grab a gallon sized ziplock baggie, fill it with your frosting, and then snip off a corner so that you have about a 1/2 inch opening. VoilĂ , you are a pastry chef extraordinaire.


*Helpful tip for boxed cake mix: I make a lot of cupcakes, but it's rare that I ever want the full 24-28 cupcakes that come in a box. Or sometimes I want to make different flavors, but don't need a whole box of each. So instead of wasting ingredients, I divide the mix into thirds (thirds because boxed mix usually calls for 3 eggs). Measure out 1-1/4 cups of the dry mix and store each third in a small ziplock baggie (there might be a smidge extra, so just divide it among the bags). Store the unused bags of cake mix in the original box so that you still have the directions when you use the remainder and so that you remember what flavor it is. 

This recipe in particular will make even more cupcakes because a large chunk of the batter is replaced with a sandwich cookie.

Mint Oreo Cupcakes

Makes 30 cupcakes

Cake
1 box red velvet cake mix
1 package mint sandwich cookies (mint Oreos, mint Newman-Os, or Mint Joe-Joes from Trader Joes)
3/4 tsp. peppermint extract
muffin cups

Mint Frosting
12 oz. cream cheese
8 tbs. butter (1 stick)
6 cups powdered sugar (or more or less as needed)
1/2 tsp. vanilla extract
1/2 tsp. peppermint extract 
6-8 drops green food coloring
bar of chocolate (optional decoration) 

Line muffin tin with muffin cups. Place one sandwich cookie in each cup. Prepare cake batter as directed; add 3/4 tsp. mint extract. Fill muffin cups 3/4 full and bake as directed. Let cool before frosting.

For frosting, use room temperature ingredients. If you forgot to take out your butter in advance, microwave it for 5 seconds, then flip the butter chunk and microwave for another 5 seconds. Mix cream cheese and butter together with a hand mixer. Add powdered sugar 2 cups at a time and continue to mix. First it will get crumbly, but keep mixing! 6 cups of powdered sugar is an estimate; add sugar progressively until you get the flavor/consistency that you like. Mix in extracts and food coloring.

Fill a pastry bag with frosting and pipe onto cooled cupcakes. For an added decoration, shave pieces of you favorite chocolate bar onto frosted cupcakes. I used a standard vegetable peeler on a large milk chocolate bar. Another yummy option would be chopped up Andes candies bits.

Your holiday entertainees will be too busy scarfing up your cupcakes to care that they came from a box. 


Thursday, December 2, 2010

White Chocolate Dipped Macaroons w/Sprinkles(!)


Ok, friends, I’ve officially had my first baking disaster. I am 28 years old and somehow, until now, the difference between parchment paper and wax paper has eluded me. I thought the two were interchangeable, but I just learned the hard way that wax paper melts. And not just melts, but seals itself onto your food like some kind of arts & crafts project (think decoupage). I know. I’m very embarrassed. 

The only reason this didn’t happen sooner is that I typically bake on a silicone baking mat and therefore never actually need parchment paper. I know that I risk losing some baking cred by sharing this, but just in case anyone else out there is dim to this fact, I want to save them a ruined dessert. Takeaway: parchment paper is brown, has a nonstick, waxy finish and can be used in the oven; wax paper is thinner, translucent, waxy and NOT heat-proof. Because I didn’t have the time or the patience to redo this recipe, I salvaged what I could and am sharing it anyway (because it was real tasty). 

On to the main event! In People magazine’s recent “Holiday Entertaining” issue, Gail Simmons of Top Chef shared a number of holiday dessert recipes, including macaroons. She called them “Toasted Coconut Macaroons.” This confused me because there was no step for toasting the coconut (nice try, Gail). I looked up a few other recipes to see whether people actually toast the coconut before making macaroon batter. Some do. But I mulled it over and decided that what I like about macaroons is the crispy golden shell and the soft chewy insides that retain a raw coconut consistency. I reasoned that since this recipe already had a low liquid to coconut ratio, I didn’t want to lose any of the coconut moisture prior to baking. So I went with Gail’s recipe, skipped the toasting, and dropped the misleading title. 


I was very excited about the decorating aspect of these cookies and ready for some holiday-themed sprinkles. Since I was baking at my parents’ house in upstate New York (hence the lack of my trusty silpats), I was limited to grocery stores in the Vestal, NY area. They did not carry the holiday sprinkles of my dreams, but for some ridiculous reason, I thought that I might have the patience to divide out the sprinkles in a multi-colored package so that I could have separate piles of red, green and white sprinkles. Don’t ever fool yourself into thinking this is a reasonable idea. 


Once upon a time, my friend KG joined a sorority and when I asked about the mysterious hazing process, she told me the worst thing they had to do was sort out colored sprinkles. Only now do I realize what a horrific, tedious, hair-pulling process this must have been (although compared to other hazing stories I’ve heard, the PSU Zetas sound pretty nice). Every time I would separate a few of the balls, the other ones just rolled back over to rejoin the party. Anyhow, I quit that business pretty quickly and embraced a multi-colored theme. Don’t worry, they still came out very festive and cute (I know you were worried).


White Chocolate Dipped Macaroons
adapted from Gail Simmons’ recipe in the People 2010 Holiday Entertaining issue

Makes 18 macaroons

2 egg whites
½ tsp. cream of tartar
2 tsp. sugar
¾ cups sweetened condensed milk (one 14 oz. can will be enough)
½ tsp. vanilla extract
2 tsp. lemon juice
zest of one lemon
14 oz. sweetened, shredded coconut
1 cup white chocolate chips (or milk or dark chocolate if you prefer)
sprinkles of your choice

Preheat oven to 325 degrees.  Beat egg whites with an electric mixer on low speed until frothy. Add cream of tartar and sugar. Continue beating whites on a medium speed until very frothy, but not stiff (if you overbeat the whites and peaks start to form, it’s fine). By hand, mix in vanilla, lemon juice, zest and condensed milk (make sure you don’t use the electric mixer here because mixing in the thick condensed milk it will kill all the bubbles you’ve added to the whites). Fold in coconut until incorporated. Let mixture rest for 3 minutes.

Line two cookie sheets with parchment paper or heavily grease the pans. Using an ice cream scoop (or large spoon), drop heaping mounds of batter onto the trays. Bake for 30-35 minutes. Let cool.

Melt chocolate in a double boiler over low heat. Of all chocolates, I find white chocolate the most difficult to melt evenly. Put the chocolate in the boiler from the start and let the water heat up underneath so that the chocolate melts slowly; stir very often. If you are a master-melter and your chocolate melts smoothly, dip the cooled macaroons into the chocolate until halfway coated. If your chocolate does not melt smoothly, spread the melty chocolate onto the macaroons with a butter knife. Add sprinkles immediately after coating each macaroon and let cool on a rack until chocolate hardens.

Macaroons are very sweet, so you might want to leave some without chocolate. But honestly, if you’re eating something like a macaroon, you might as well go whole hog and enjoy it smothered in chocolate and sprinkly goodness.

N’joy.

Sunday, November 7, 2010

Halloween Triple Fudge Brownies with Peanut Butter Cream Cheese Icing

It's Halloween!!!!!!!!! No, wait, it's not Halloween. It's November 7, which is nothing (unless you count the first day after daylight savings time as an event worthy of mention; your call). But I've discovered that this whole blogging about real events thing doesn't always translate into "current" posts. Cuz dang, folks, cooking/photographing/editing/writing/posting is a time consuming process. Generally, I can get around this problem by fudging when events occur, but for some things (e.g., major holidays), that just doesn't work. 

Since becoming a food blogger a month ago, I've tried to check out as many other food blogs as I can. And let me tell you, there are LOTS, just oodles of food blogs out there. People will post about anything from baking dog biscuits to filling nearly empty peanut butter jars with yogurt (I read not one, but two blogs in the same day highlighting this pb jar phenomenon). Some bloggers tell you all about their lives and experiences and make you feel like you're BFFs even though you've never met (Front Burner Blog - thanks for the intro, Carrie!), and some have photographs and styling that are so breathtaking, you could just die (What Katie Ate - seriously, so good it kills me; see the cheese shop photo shoot).

I've discovered that some people can just blog and blog and blog and blog and do it everyday. They must have superpowers (or no day jobs). These super-bloggers are reading my post now saying, "Ha! What a weakling! This girl only posts once or twice a week!" But it's the best I can eek out for the time being and I'm ok with that.

So, now, one full week after Halloween (and 8 days after the party where these brownies made their debut), I'm sharing them with you.


I happen to think brownies from a box are awesome (in particular, the Ghirardelli Turtle Brownies, made in an 8 x 8 square pan so that they come out thick and gooey). I could never understand why anyone would want to make brownies from scratch, when such perfectly delectable chewy brownies could be whipped up with just an egg and some oil. But since I blog about food now, I figured I should Martha up and do some homemade brownie bites. I started at Whole Foods and bought four kinds of chocolate. I didn't use all four, but I like to be prepared. The "triple" fudge ultimately came from: 1) semi-sweet chocolate chips, 2)  bittersweet baking chocolate, and 3) unsweetened cocoa.

But the real deliciousness comes from the PB cream cheese frosting. Holy hannah, it's good.


And a sneak preview of our Halloween costume prop . . . 


Buuuut, I won't make you wait too long for the main event. :) Our costumes were inspired by my amazing arm wrestling feat from earlier this Fall. We were the DC Roller Girls:

I played the part of the "jammer" complete with helmet stars, and we crafted these snazzy t-shirts with sweet roller derby-esque names.

In total we had a six man team, but could never get our act together for a full team photo (roller derby girls are known for being all over the place and generally a little crazy . . . we were just playing our roles).


And there was even some arm wrestling:


Halloween was way fun and resulted in dancing until 4am. Sadly at that point all the brownies had been eaten.

Triple Fudge Brownies with PB Cream Cheese Icing

Brownies
1/2 cup unsweetened cocoa
1/2 tsp. baking soda
1/4 tsp. salt
2/3 cup vegetable oil (divided in half)
1/2 cup boiling water
3 oz. melted bittersweet chocolate
1-1/2 cups sugar
2 eggs
1 tsp. vanilla
1-1/3 cups unbleached flour
1 cup milk or semi-sweet chocolate chips

Preheat oven to 350 degrees. Mix cocoa, salt and baking soda. Add 1/3 cup vegetable oil and boiling water and mix well. Over a double boiler (or a bowl set on top of a saucepan filled an inch high with simmering water), melt the bittersweet chocolate. Stir melted chocolate into cocoa/oil/water. Add sugar, eggs, vanilla and remaining 1/3 cup of oil and mix well. Mix in flour until just incorporated. Fold in chocolate chips.

Grease two muffin tins. Pour batter evenly into tins (cups should be about half full). Bake for 20-25 minutes at 350 degrees. When testing the "doneness" of brownies, I will often take them out even when they seem a little raw in the middle (something I wouldn't do, for example, with cake mix). This helps avoid burned edges. Also, the general public seems to delight in underdone brownies.

PB Cream Cheese Icing (ratios adapted from Food.com)
6 oz. cream cheese (easiest if room temperature)
2 tbs. butter (easiest if room temperature)
1/2 tsp. vanilla
2.5 cups powdered sugar
1/4 cup creamy, all-natural peanut butter

Blend all ingredients using an electric hand mixer until smooth and fluffy. This will work best if your cream cheese and butter are both at room temperature. If you lack the foresight for that (like me), you can microwave each for 5 seconds, then flip and microwave for another 5 seconds. You can obviously use any peanut butter you want, but all-natural PB has a very different texture that makes this frosting AAH-mazing. Smucker's make an all-natural PB, so you should be able to get it at any grocery store.

My brownies came out like craters (the tops weren't flat, more like tiny bowls). To remedy, I did a first layer of frosting to fill in the bowls and catch any crumbs, and then popped the frosted brownies in the freezer (10 or so minutes is fine). Then I did a quick second layer of room temperature frosting, which works better for the spiderwebs.

Ganache (for making spider webs)
2 tbs. heavy cream
1 oz. chocolate (I used bittersweet)

Microwave cream in a mug for 1:45-2:00 minutes (should be simmering when you remove). Add chocolate and stir until smooth. Transfer ganache into the corner of a small plastic ziplock baggie (for use as a piping bag) and snip off the very tip of the corner. Use piping bag to make three concentric circles on each brownie. Using a sharp knife, run the tip of the knife from the center of the brownie outwards through the ganache circles 8 or 9 times (see photos above). Do the knife step shortly after piping the ganache, as it will start to harden up and won't look as webby if you wait too long.

Garnish with Halloween spider rings (or, um, bats if that's all you have . . . ).

Makes 22-24 spooky brownies

Thursday, October 21, 2010

Welcome Cookies with Lots of Oats & Chocolate


Nothing takes me home like chocolate chip cookies (C3s). Not because my mom baked lots of cookies or because I’ve got some secret family recipe passed down for generations. There is just something about the smell of C3s baking in the oven that makes me want to be having a sleepover with my g-friends at my parents’ house in upstate New York. I can’t pinpoint why, though I have a sneaking suspicion it is in large part due to the 1980s Nestle Toll House ad campaign (I fancy myself as the cute one with the pigtails, but really I was the girl with the giant glasses and bad haircut). Anyhow, that’s what this blog about. Home, family, friends and sharing (and sweets and sleepovers and vintage commercials). 


I realize now, several posts in, that I haven’t taken the time to properly welcome everyone to Shared Bites. No time like the present! And it seems only fitting to welcome readers with this recipe. These oatmeal C3s were born during a phase where I only wanted to make vegan cookies. (Rewind: lots of duds during that phase. Not because it’s hard to make a tasty vegan treat, I was just using the wrong avenues. But that’s a story for another day.) Admittedly, they aren't always vegan anymore, but both versions taste almost identical and are equally quick and delicious. Both options provided below; vegan ingredients in parentheses. These cookies are chewy and flavorful and amazingly decadent for a cookie with no butter.

And with that, I welcome you to Shared Bites. Share on.

*A quick note about oatmeal. Sometimes you'll read recipes that specify whether to use old fashioned oats or quick cooking oats. As a general rule, I purchase quick cooking oats because I have found them to be better for cooking and baking (pancakes, bread, cookies). But there have definitely been times when I've found myself with only old fashioned oats (like when I put "oats" on the grocery list and my sous chef was doing the grocery shopping - lesson learned). Not a problem.


The photo above shows old fashioned oats on the left and quick cook oats on the right. The difference goes beyond just oat size (quick cook oats are processed further than old fashioned oats), but for my purposes, tossing old fashioned oats into a food processor or mini chopper does the job. So use whichever oats you have/like. (Disclaimer: some people who are not me feel very strongly about using old fashioned, unprocessed oats. Please don't share this with those oat nazis.)


Oatmeal Chocolate Chip Cookies

1.5 cups whole wheat pastry flour
2.5 cups oats
1 tsp. salt
1 tsp. baking soda
3/4 cup canola or vegetable oil
1-1/3 cups sugar (I like turbinado here A LOT. Big sugar crystals and oatmeal come together for an awesome consistency.)
2 tbs. skim milk (I usually use plain rice milk; soy is also fine)
1 egg (or 1/2 thoroughly mushed banana or 1/4 cup applesauce)
1.5 tsp. vanilla 
1 cup chocolate chips (I use Whole Foods 365 Vegan Chocolate Chips)

Preheat oven to 325 degrees. Mix flour, oats, salt and baking soda. Add chocolate chips (recipe calls for 1 cup, which makes for a very high chip-to-cookie ratio; feel free to reduce).

Mix sugar and oil. Add milk, egg and vanilla to sugar and oil. Combine wet and dry ingredients. You won't get a typical cookie "dough," which is normal. As pictured above, the dough remains pretty wet. Because of the wetness of the dough, a structured scooping tool is supremely helpful. I use a medium cookie scoop (which works just like an old fashioned ice cream scoop). Before I had the cookie scoop, I used a tablespoon to get uniform cookies (though a bit small). Scoop dough onto ungreased cookie sheet.

Bake for 13-14 minutes at 325 degrees if using a medium cookie scoop; 10-12 minutes if scoops are tablespoon-sized.

Makes 40 2" cookies (I usually make a half batch. Yes, this requires half an egg - whisk one egg in a separate bowl and do your best to eyeball half the egg into the mix.)


Related Posts Plugin for WordPress, Blogger...