Friday, December 17, 2010

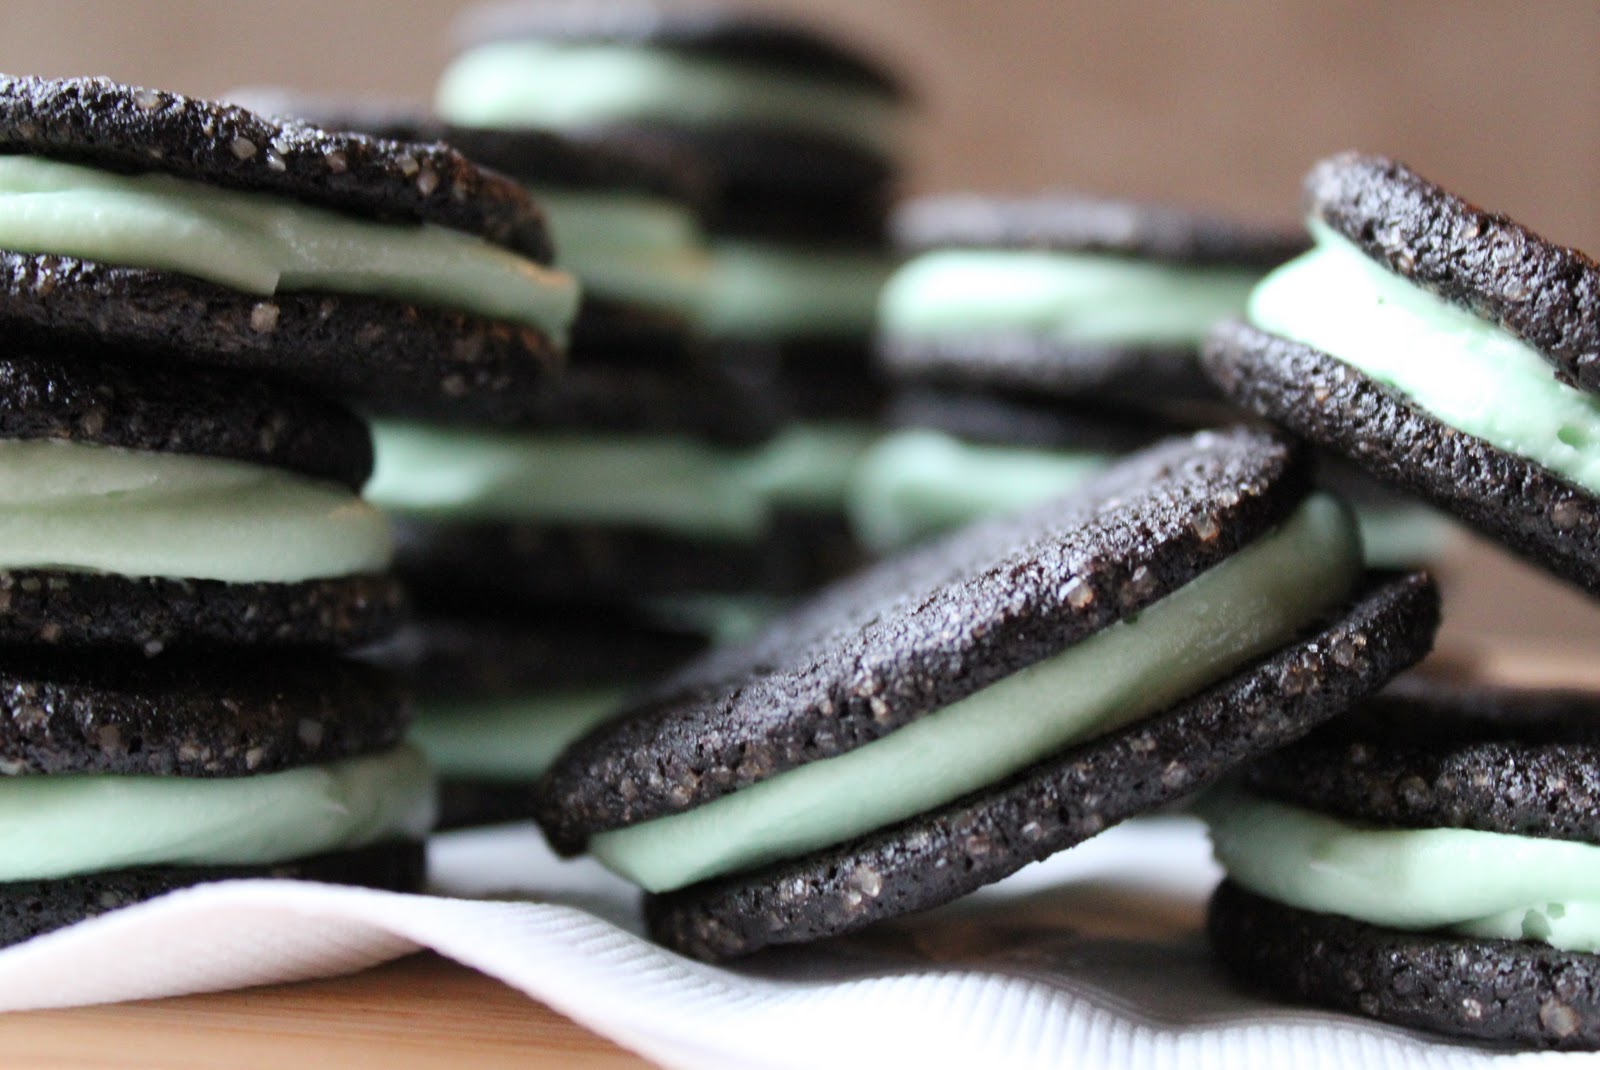
Cookie Party v1.0 - Homemade Mint, Hazelnut & Vegan PB Oreos


As we've established, I'm a blogger now. Bloggers do weird things like be friends with each other even when they've never met. Weird, but also very sweet. As I learned this past weekend, Washington, D.C. has quite the cache of young, female bloggers who share a common interest in food, photography, healthy living, exercise and obsessive compulsive behavior (I kid . . . sortof). 

One such gal, Lisa, was very graciously opening her home to local bloggers for a cookie swap. My first thought: "That is so cool, I totally want to be a part of that! Gepetto, make me a real blogger!" My second thought: "Hold your horses, cowgirl, you don't know any of these people. Stick to what you know." I felt kind of like a weirdo inviting myself to a party at someone else's house where I wouldn't know another soul, buuuuuut, what the hell. I decided it would be good to get out and meet some new people.

I tried to explain the situation to a guy I work with, and it led to some second guessing:

       Katie: "Guys, I'm going to a party with other DC bloggers that I've never met to exchange cookies!"
       Co-worker: "Were you invited to this party?"
       K: "Not exactly."
       CW: "Do you know the host?"
       K: "Mmm, no."
       CW: "Are you going with some who knows the host?"
       K: "N-n-n-o-o." (Deflated voice; no more exclamation points.)
       CW: "Kathryn, will you know anyone at this party?"
       K: "No."
       CW: "I don't get it."
       K:  :(

And so, by the time the cookie party rolled around, I was feeling a little nervous. Maybe this really was a ridiculous idea. Plus I had caught cyberwind of what some of the other bloggers were making and was feeling inadequate. Originally, homemade oreos sounded so wonderful, but when I heard some of the fancy names of other cookies, oreos seemed kind of pedestrian. But at that point, I had all the ingredients for oreos plus two other events to prep for over the weekend. No time for changing plans.


Prepping for the party was kind of like getting ready for a first date. You don't know the person you're meeting, you want to make a good impression, you're crossing your fingers alcohol will be readily available and you try to plan for an easy exit in case it's a disaster. This, however, was a date with 20 other women. Way. More. Intense.

Fortunately, there was nothing intense about the situation at all. Everyone was amazingly nice and complimentary and funny. Most of the other people were in the same boat as me and didn't know any of the other guests. And it was really neat to talk to so many other bloggers.  

And the cookies, WHOA. Let's just say everyone brought their A game. I wish I had taken notes on who brought what, but see above re feelings of nervousness - I was not in a mental position to plan for note-taking. I do remember that Chase brought my absolute favorite kind of cookies, Italian pizelles (made without anise - not the traditional Italian method, but just the way I like them!). Clearly, we were instant friends.


Talk about crafty! These tree cookies were like little works of art.
I do remember that above and below were made by the host and co-host, Lisa and Emily. Both delish.

And for the record, my oreos were big hit (I think the pretty packaging helped). I served them at room temperature for the party, but these cookies are best eaten when frozen or thawed for 10 minutes or so (this also keeps the frosting from squishing out the sides when eaten).

*My apologies: I had originally posted the recipe for a very large batch of these wafer cookies, which makes a LOT of dough. More than my food processor can handle. Corrected measurements below.

Homemade Oreo Cookies

Makes 28-30 sandwich cookies

Chocolate wafers adapted from Smitten Kitchen's icebox cupcakes (vegan substitute ingredients in parens)

3/4 cups unbleached all-purpose flour
3/8 cup unsweetened cocoa powder (use dark cocoa if you can find it)
1/2 cup plus 1 tbs. sugar (v - vegan sugar)
1/8 tsp. salt

1/8 tsp. baking soda
7 tablespoons unsalted butter, slightly softened (v - Earth Balance Vegan Buttery Sticks or similar product)
4 tsp. milk (I used skim) (v - plain soy milk)
1/2 tsp. vanilla extract

turbinado or demerara sugar for rolling (v - vegan sugar)

Combine flour, cocoa, sugar, salt and baking soda in a food processor and pulse until mixed. Cut butter into chunks and add to processor. Pulse until incorporated (it will look like little chocolate crumbs). Mix the milk and vanilla together in a small bowl and add to the processor while pulsing. Continue to pulse or run the processor until the mixture forms a ball (keep pulsing, it will happen).

Roll the ball out into a log around 14 inches long. Roll the log in turbinado or other large sugar crystals until coated. Wrap the log in wax paper or foil and refrigerate for an hour or so (longer is fine; I left mine overnight).

Preheat oven to 350 degrees. Slice log into 1/4 inch thick slices and place on a baking sheet. The cookies will spread, so do not place too closely together. Bake for 10-11 minutes. Cookies should get crispy as they cool. 


Frostings:

A foreword on frosting: I do not measure frosting ingredients (though I do my best to provide estimates for you). For add-ins like hazelnut and peanut butter, I just add until tasty. I do the same with the powdered sugar. More sugar here would probably serve the purpose of making the frosting very thick, like real oreo creme, but I prefer the taste with less sugar. Also, if you are working with an organic powdered sugar, you really must sift the sugar or put it through a mesh strainer before using (for some reason the organic kinds are clumpier).

Each recipe below is enough for one batch of wafer cookies from above.

Hazelnut (this was so outrageously yummy)
6 tbs. butter
3 tbs. cream cheese
1/3 cup hazelnut spread, such as Nutella
2 to 3 cups powered sugar
splash milk
1/2 tsp. vanilla extract

Mix butter and cream cheese with a hand mixer. Add Nutella, milk and vanilla; mix. Blend in powdered sugar slowly.

Mint
See recipe from Mint Oreo Cupcakes. Divide batch in half.

Vegan Peanut Butter
1/2 cup (1 stick) Earth Balance Vegan Buttery Sticks
1/4 cup natural peanut butter (I like Smucker's because it is thicker than most brands)
2 to 3 cups powdered sugar
splash of soy milk
1/2 tsp. vanilla

Mix butter and peanut butter with a hand mixer. Add milk and vanilla; mix. Blend in powdered sugar slowly.

Assembly: Fill a quart sized ziplock bag with your frosting of choice and snip off 1/2 inch of the tip. Pipe generously onto one wafer cookie and top with a second wafer cookie. Serve after freezing or refrigerating.

Tuesday, December 14, 2010

Your 2010 Handmade Gift Guide

I love presents. Love love love them. I love giving them and I love getting them. I love the anticipation that comes before them and the emotions that come along with the unveiling. So you can bet I love Christmas. And I RELISH the feeling you get when you have found a fabulous, personalized Christmas gift for someone in your life.

There is no better place to find unique, thoughtful gifts than the electronic bible for all things handmade, Etsy. I was reminded the other day that not every human on the planet knows about Etsy (though my gut tells me everyone reading this blog does), when a guy I work with came looking for a recommendation for funky jewelry. I suggested Etsy and (obviously) he was delighted with the results.

To save you folks time, I pulled together some of my Etsy faves that would make great gifts this holiday season.

*Please note that all photos shown below are the property of the sellers listed. Sources are available in the corresponding product links.

Stuff someone's stocking with this beautifully crafted footed mini cutting board made of rock maple ($32) from Gray Works Interpretive Furniture Designs. The Gray Works duo creates everything exclusively from locally, sustainably harvested or salvaged hardwoods in Woodstock, NY. This gift will prove both eco-friendly and countertop-friendly.


Looking for a hostess gift? Live From Bklyn has unique and affordable block print tea towels, like the williamsburg flour sack towel ($15) pictured here, that are sure to delight your entertaining friends.

Finally, a cool twist on the old standby gift for men. The peeps at the Cyberoptix Tie Lab have taken the "theme" tie and made it cool (incredible, right?). My personal fave is the turntable tie ($40), but among other awesome themes, they also have a beer tie and a bacon tie. Picture this: Guy gets compliment on classiness of the tie his significant other purchased (score one, significant other). In greatest moment of guy's life, he can exclaim that his tie in fact depicts bacon! There are no losers here.


Buying for babies? Save the little ones from the mundanity of Babies'R'Us (gah, that place gives me an eye twitch) and pick up a smart creature dance party onesie ($16) from by bethany.


If you've got a chef on your list, consider these beautiful handmade porcelain measuring cups ($32.70) from Mudaliscious. Bakers in particular will delight in having such unique tools for their tasty endeavors.


Caramel of the Month Club ($56 for 6 months) from Have it Sweet. A delicious new caramel every month! Need I say more? Have it Sweet is not accepting any more orders for Christmas, but you can purchase the Caramel of the Month Club for your sweet-toothed loved ones and let them know it's coming.


I like bikes. Everyone likes bikes. They are reminiscent of a simpler time (says this wise old 28 year old). Jazz up your drinkware collection with these screen-printed bicycle glasses ($35 for 4) from Vital. Or if you're a high roller, customize it!

Not buying gifts for everyone? Spread holiday cheer with the cutest cards imaginable from Deepfried Curious & Delicious Paper Goods. I'm partial to the vintage style note cards featuring Rudolph, Santa and Frosty ($26.50 for 18), but she's got note cards and other paper products for all occasions. Don't you just want those card characters to come to life and start talking to one another? Because I do.

Good luck shoppers - only 11 days left! (PS - I realize that shipping from little Etsy shops may take longer than from conglomomart.com and that I should have posted this sooner. But I didn't.)

Sunday, December 12, 2010

Mint Oreo Cupcakes and Uh, Laziness


Sooooo, I feel like we know each other pretty well now . . . and I feel like I can be honest with you all. The cupcakes pictured here are um, well, they're from a box. I wrote it really tiny because I'm ashamed. Like the little kid who whispers and turns away when he has to tell his parents that he flushed his brother's underwear down the toilet. I found myself baking at 11pm not once, but twice this week and I just didn't have the energy to bust out my measuring cups. Please don't judge me.

The thing is, they were so easy and delicious, I don't even regret it. If I want to make a fancy kind of cake, like something with fresh fruit, or if I'm baking something really special, I take pleasure in making a cake from scratch. Or if I want to experiment with a new kind of flour, I'm totally game for measuring ingredients until I'm blue in the face. But when the star of the show is really the homemade mint frosting and surprise cookie crust (coupled with the fact that my chance at getting more than 5 hours of sleep is getting smaller and smaller), I'm ok turning to a box. Organic food stores now have some good choices for boxed cake mix if you're concerned about ingredients. This girl, however, turned to Betty Crocker.

I made these cupcakes twice this week, once with red velvet cake mix and once with plain chocolate. The red velvet was definitely the winner. It tasted better with the cookie and the frosting (plus made a nice red and green theme for our holiday treats). I also tested out using a full oreo cookie in each cupcake versus twisting off the top wafer and just using one wafer plus icing. Using the full oreo was the clear winner.

Secret: if you want to wow your friends with cupcakes, just use a pastry bag for the frosting. Not only does it produce beautiful, evenly frosted cupcakes, it is SO FAST. I probably frosted 16 cupcakes in three minutes. Just do your best to avoid air bubbles in the pastry bag when filling it with frosting. I'm lucky enough to have a BFF that owns an amazing bake shop in NYC, CityCakes (if you live in the city, go there! Owner chefs Marc and Benny are nice and easy on the eyes), so I learned from the best. But it's not rocket science and I'm confident you too can make a perfectly frosted cupcake.

I used a standard Wilton brand pastry bag with a wide metal tip. If you don't have these tools, grab a gallon sized ziplock baggie, fill it with your frosting, and then snip off a corner so that you have about a 1/2 inch opening. Voilà, you are a pastry chef extraordinaire.


*Helpful tip for boxed cake mix: I make a lot of cupcakes, but it's rare that I ever want the full 24-28 cupcakes that come in a box. Or sometimes I want to make different flavors, but don't need a whole box of each. So instead of wasting ingredients, I divide the mix into thirds (thirds because boxed mix usually calls for 3 eggs). Measure out 1-1/4 cups of the dry mix and store each third in a small ziplock baggie (there might be a smidge extra, so just divide it among the bags). Store the unused bags of cake mix in the original box so that you still have the directions when you use the remainder and so that you remember what flavor it is. 

This recipe in particular will make even more cupcakes because a large chunk of the batter is replaced with a sandwich cookie.

Mint Oreo Cupcakes

Makes 30 cupcakes

Cake
1 box red velvet cake mix
1 package mint sandwich cookies (mint Oreos, mint Newman-Os, or Mint Joe-Joes from Trader Joes)
3/4 tsp. peppermint extract
muffin cups

Mint Frosting
12 oz. cream cheese
8 tbs. butter (1 stick)
6 cups powdered sugar (or more or less as needed)
1/2 tsp. vanilla extract
1/2 tsp. peppermint extract 
6-8 drops green food coloring
bar of chocolate (optional decoration) 

Line muffin tin with muffin cups. Place one sandwich cookie in each cup. Prepare cake batter as directed; add 3/4 tsp. mint extract. Fill muffin cups 3/4 full and bake as directed. Let cool before frosting.

For frosting, use room temperature ingredients. If you forgot to take out your butter in advance, microwave it for 5 seconds, then flip the butter chunk and microwave for another 5 seconds. Mix cream cheese and butter together with a hand mixer. Add powdered sugar 2 cups at a time and continue to mix. First it will get crumbly, but keep mixing! 6 cups of powdered sugar is an estimate; add sugar progressively until you get the flavor/consistency that you like. Mix in extracts and food coloring.

Fill a pastry bag with frosting and pipe onto cooled cupcakes. For an added decoration, shave pieces of you favorite chocolate bar onto frosted cupcakes. I used a standard vegetable peeler on a large milk chocolate bar. Another yummy option would be chopped up Andes candies bits.

Your holiday entertainees will be too busy scarfing up your cupcakes to care that they came from a box. 


Thursday, December 2, 2010

White Chocolate Dipped Macaroons w/Sprinkles(!)


Ok, friends, I’ve officially had my first baking disaster. I am 28 years old and somehow, until now, the difference between parchment paper and wax paper has eluded me. I thought the two were interchangeable, but I just learned the hard way that wax paper melts. And not just melts, but seals itself onto your food like some kind of arts & crafts project (think decoupage). I know. I’m very embarrassed. 

The only reason this didn’t happen sooner is that I typically bake on a silicone baking mat and therefore never actually need parchment paper. I know that I risk losing some baking cred by sharing this, but just in case anyone else out there is dim to this fact, I want to save them a ruined dessert. Takeaway: parchment paper is brown, has a nonstick, waxy finish and can be used in the oven; wax paper is thinner, translucent, waxy and NOT heat-proof. Because I didn’t have the time or the patience to redo this recipe, I salvaged what I could and am sharing it anyway (because it was real tasty). 

On to the main event! In People magazine’s recent “Holiday Entertaining” issue, Gail Simmons of Top Chef shared a number of holiday dessert recipes, including macaroons. She called them “Toasted Coconut Macaroons.” This confused me because there was no step for toasting the coconut (nice try, Gail). I looked up a few other recipes to see whether people actually toast the coconut before making macaroon batter. Some do. But I mulled it over and decided that what I like about macaroons is the crispy golden shell and the soft chewy insides that retain a raw coconut consistency. I reasoned that since this recipe already had a low liquid to coconut ratio, I didn’t want to lose any of the coconut moisture prior to baking. So I went with Gail’s recipe, skipped the toasting, and dropped the misleading title. 


I was very excited about the decorating aspect of these cookies and ready for some holiday-themed sprinkles. Since I was baking at my parents’ house in upstate New York (hence the lack of my trusty silpats), I was limited to grocery stores in the Vestal, NY area. They did not carry the holiday sprinkles of my dreams, but for some ridiculous reason, I thought that I might have the patience to divide out the sprinkles in a multi-colored package so that I could have separate piles of red, green and white sprinkles. Don’t ever fool yourself into thinking this is a reasonable idea. 


Once upon a time, my friend KG joined a sorority and when I asked about the mysterious hazing process, she told me the worst thing they had to do was sort out colored sprinkles. Only now do I realize what a horrific, tedious, hair-pulling process this must have been (although compared to other hazing stories I’ve heard, the PSU Zetas sound pretty nice). Every time I would separate a few of the balls, the other ones just rolled back over to rejoin the party. Anyhow, I quit that business pretty quickly and embraced a multi-colored theme. Don’t worry, they still came out very festive and cute (I know you were worried).


White Chocolate Dipped Macaroons
adapted from Gail Simmons’ recipe in the People 2010 Holiday Entertaining issue

Makes 18 macaroons

2 egg whites
½ tsp. cream of tartar
2 tsp. sugar
¾ cups sweetened condensed milk (one 14 oz. can will be enough)
½ tsp. vanilla extract
2 tsp. lemon juice
zest of one lemon
14 oz. sweetened, shredded coconut
1 cup white chocolate chips (or milk or dark chocolate if you prefer)
sprinkles of your choice

Preheat oven to 325 degrees.  Beat egg whites with an electric mixer on low speed until frothy. Add cream of tartar and sugar. Continue beating whites on a medium speed until very frothy, but not stiff (if you overbeat the whites and peaks start to form, it’s fine). By hand, mix in vanilla, lemon juice, zest and condensed milk (make sure you don’t use the electric mixer here because mixing in the thick condensed milk it will kill all the bubbles you’ve added to the whites). Fold in coconut until incorporated. Let mixture rest for 3 minutes.

Line two cookie sheets with parchment paper or heavily grease the pans. Using an ice cream scoop (or large spoon), drop heaping mounds of batter onto the trays. Bake for 30-35 minutes. Let cool.

Melt chocolate in a double boiler over low heat. Of all chocolates, I find white chocolate the most difficult to melt evenly. Put the chocolate in the boiler from the start and let the water heat up underneath so that the chocolate melts slowly; stir very often. If you are a master-melter and your chocolate melts smoothly, dip the cooled macaroons into the chocolate until halfway coated. If your chocolate does not melt smoothly, spread the melty chocolate onto the macaroons with a butter knife. Add sprinkles immediately after coating each macaroon and let cool on a rack until chocolate hardens.

Macaroons are very sweet, so you might want to leave some without chocolate. But honestly, if you’re eating something like a macaroon, you might as well go whole hog and enjoy it smothered in chocolate and sprinkly goodness.

N’joy.

Monday, November 29, 2010

Mexican Hominy Lime Soup, Olé

(I didn’t get many pictures of the cooking process, but I couldn’t deny readers this recipe because it is SO YUMMY.) 

Exactly one year ago from yesterday, I was in Cozumel, Mexico cheering on my BFF Travis in his first Ironman triathlon (congrats to all of the 2010 finishers!). Spectating at an Ironman is no small feat. It involves anywhere from 10-17 hours (in this case, 12) of running around in the heat trying to catch a 5 second glimpse of your racer. But believe me, your racer needs those 5 seconds, so you just do it. As spectating locations go, however, I certainly can’t complain about Cozumel. I was lucky enough to get a tropical vacation out of the deal (other popular Ironman locales include Kentucky and Idaho). 

As part of this vacation, we rented a condo with our parents and hired a local cook to come in and prepare our meals. Sounds so lavish, right?! It was actually much cheaper than eating out every night and so much more delicious than making our own food. Our cook, Sylvia, was amazing (e-mail me if you're ever in the Yucatán neighborhood and looking for a cook). My dad ate so much, I thought we might have to get his stomach pumped - which would not have been my first time in a Mexican hospital (story for another day). 


One of my family's favorite dishes was a super-spicy chicken soup. Unfortunately, between our zero knowledge of Spanish and Sylvia’s minimal English, we never really found out what else was in the soup. I recently came across a Martha Stewart recipe for Green-Chile Pozole, which kind of resembled Sylvia's homemade spicy soup and as I was home visiting my parents, I thought I would treat them to a little reminder of Mexico. And since it was two days after Thanksgiving, it was the perfect opportunity to use our leftover turkey bits.

"Pozole" or "posole" describes a traditional kind of Mexican soup made with corn and meat. The Martha Stewart recipe called for a number of ingredients that were not readily accessible, so I concocted a simplified version that used the same key ingredient: hominy. Hominy is dried kernels of corn that have been boiled in water and soaked in lime until they swell, so that the hulls and germs can be removed. You might find ground hominy, especially in the south, but for this pozole, you want whole hominy or "big" hominy (the soaked kernels resemble chickpeas in size and texture). If your grocery store has an international aisle, check there first. Otherwise, look near the canned beans and veggies.

My pozole ended up tasting different from Sylvia's beloved soup, but I daresay . . . it was equally good. It lacked the extreme spiciness (because I didn't use habaneros, only jalapeños), but the flavor was incredible. When I took the lid off the pot after a couple hours on the stove, it had that smell that you can only find in a really good Mexican restaurant (sweet and spicy and limaliscious). If you like real Mexican food, you have GOT to make this dish. Garnish with diced jalapenos, fresh avocado, feta or cotija cheese, and extra lime slices for squeezing.


If you want to do a vegetarian version, just swap out the chicken stock for vegetable stock, skip the meat, and use 2 onions and 2 cans of hominy.

Mexican Hominy Lime Soup

Serves 5-6 as a main course

olive oil
1 medium white or Spanish onion
4 cloves of garlic, chopped
1 jalapeño, seeded and diced
64 oz. (2 qts.) chicken stock
1 15 oz. can of hominy, drained but not rinsed
1 tbs. oregano (use Mexican oregano if you happen to have it)
juice from 3 limes
1 bunch of cilantro
1 small can of diced green chilies
a few shakes of salt
12-16 oz. cooked, shredded chicken or turkey

Suggested garnishes
extra diced jalapeños
sliced avocado
crumbled feta cheese or cotija cheese
extra lime wedges for squeezing
tortilla chips

Prepare cilantro by rinsing the leaves thoroughly and chopping off the top 3 to 4 inches of the bunch (discard the bottom or save for other use). Roughly chop the leaves and stems and set aside (should be around a cup of chopped cilantro). 

Heat 3-4 tbs. of olive oil in a large stockpot over medium heat. Slice onion and add to pot. Cook onions for 5-6 minutes, adding oil as needed to keep the onions from burning. Add jalapeños and garlic and cook for another 2-3 minutes.

Add chicken stock, hominy, oregano, lime juice, cilantro, chilies, salt and meat. Reduce heat to low. Cook for at least one hour on low heat, stirring occasionally. Most delicious if cooked for 3-4 hours.

Tuesday, November 23, 2010

Tea: A Love Affair


I love tea. Love, love, love it. I love the idea that tea can be infused with any flavor under the sun. I love the way the leaves are dried out like shrinky dinks and then totally come back to life with a little hot water. And I love how tea compliments baked goods, an obvious other fave of mine. 

Just about a year ago, I met a Certified Tea Master (who knew?). It was at one of those dinners where everyone is a friend of someone else, so I was several degrees of separation from the Tea Master and I never saw her again. But she was very cool and I thought it was so neat that such a title exists and that she took such ownership of it. She even had a card to convey her mastery. In another life, maybe the title can be mine. Jeni Dodd, I salute you:

While tea mastery is not in my immediate future, I do enjoy trying as many new teas as I can get my hands on. And this week, I discovered a gem that I must share with fellow tea lovers - The Spice and Tea Exchange of Georgetown. Can you say, Green Chili Sugar? Applewood Smoked Sea Salt? Almond Cookie Tea?! I know I sound like an advertisement, but I am just so smitten with this joint. It's very small and each wall is lined with infused salts, sugars, teas, spices and blended rubs. Plus an array of kitschy tea accoutrements and free tea samples. The clerk encouraged everyone who came in to open the jars and smell the ingredients (and above each jar of loose spice or tea were pre-bagged portions ready for purchase).

Apparently, the Spice and Tea Exchange is popular in Florida and exists in a few other states, but it just arrived in Georgetown about a month ago. I bought three flavors: Coconut Oolong, Almond Cookie Tea (black tea), and Mango Green Tea, all of which smell like heaven. Plus I couldn't resist some Tangerine Sugar to sweeten it up. The Almond Cookie Tea is pictured immediately below.

Today's menu: Mango Green Tea with Tangerine Sugar. Green tea and black tea leaves come from the same plant, but green tea is not fermented the way black tea is (white and oolong tea leaves come from different plants). When steeped, green tea is lighter in color, but is not actually "weaker" than black tea (although it does have less caffeine naturally). Green tea just has a milder, earthier flavor. 

When steeping your tea, avoid using boiling water and instead shoot for very hot, but not bubbling. If your water comes to a boil, just let it rest for a minute or two before pouring over the tea leaves. For green tea, 1 heaping tsp. of tea leaves should be enough for a large mug of tea (12 oz.). I like to steep green tea for 3-4 minutes, but some people prefer only 1-2 minutes. You'll have to experiment with your own palate.


Tea-related sidebar: for the past few years, my law firm has sponsored an absolutely delightful women's tea at the Renaissance Mayflower Hotel in DC. It is held during the summer so that female summer associates (who are like interns) have a chance to chat with other female attorneys in a relaxed (and tasty) setting. It is my only opportunity to date to attend a fancy tea party and I think it's the bees knees (did I mention that everyone gets their very own tower of finger sandwiches and pastries?!). 

Apparently, some people that I work with have recently voiced opposition to the women's tea. I'm not sure if it's because of the stereotypical female flavor of the event or simply the fact that a segregated women's event is happening at all. Either way, I cannot wrap my mind around the tea hang-up, and I'm already mourning the loss of this event. If you can articulate a valid reason to discontinue the tea, I would be interested to hear it. Signed, bitter on K Street. 

Related Posts Plugin for WordPress, Blogger...