Monday, October 3, 2011

Caramelized Onion and Eggplant on Toasts

Home cookin' is great. But so is restaurant food (I'm sure I don't need to tell you that, America). There's a reason your mouth waters when you walk down streets crowded with restaurants. And it's no coincidence that the restaurant industry is raking it in (taking in an estimated $604billion in 2011).

Yes, one reason is because lots (but not all) of restaurants use all sorts of extra fats and sugars and flavor additives that you would never dream of stocking in your kitchen. But another reason, the part I prefer to think about, is because restaurants have professionally trained chefs who know how to use ingredients. They know the go-to ingredients that always taste good in any dish and they know what flavors have synergy (please forgive me for just using the word synergy). I, as a home cook with zero training, happen to think that onions are one of those ingredients that taste good in any dish. Caramelized onions are sweet and savory at the same time and go well with meats, sandwiches, eggs, cheeses, pasta - you name it!

This onion & eggplant dish tastes like it came from a restaurant. Or maybe a fancy caterer. It's hard to explain exactly what that means, but I promise it means delicious. It comes together with a sophisticated flavor straight away, and doesn't require any fancy-pants cooking knowledge. In fact, you don't even have to get top-notch ingredients. I mean, who ever says, "look at these onions - they're so fresh!" As long as your onion doesn't have weirdo spots or discoloration, it's fine. And to be quite honest, my eggplant was a little dried out. But that was no problem! You can't screw this dish up. And your dinner guests will be falling all over themselves to scoop up the last bits.
Over the summer, my high school BFF got married at a great little inn in upstate NY. One of the hors d'oeuvres was an eggplant spread that, at least according to my memory, tasted just like this one (I'm calling it a spread for lack of a better descriptor, but as you can see, it's chunkalicious). I may or may not have gone overboard tasting the eggplant spread . . . strictly for research purposes, of course. And as luck would have it, one of my recent CSA boxes had a very nice looking, albeit small (and as I would come to find, dried out), eggplant. Obviously, the-powers-that-be wanted me to re-create the wedding eggplant dish. Well, TPTB, challenge accepted.
Eggplant has a high water content, so some eggplant recipes recommend that you salt the eggplant in advance of cooking to sweat out some of the moisture (for example, you might want to do this if you have a very fresh eggplant that you're using in an eggplant parmesan to avoid getting a soup-sauce). But since a) my eggplant was dry anyway, and b) a little extra moisture is fine for this dish, I didn't do any pre-salting. You don't have to either (because even if you did end up with a lot of extra liquid in your eggplant spread, you could just use a slotted spoon to scoop it into your serving dish).

I tested the spread with both goat cheese and feta cheese and thought the feta was perfect (goat was good, but the feta was great). And if you'd rather serve this as a main course, it would make an insane panini. For a little more substance, add prosciutto and serve on a ciabatta roll. Damn, that sounds so good. Just thinking out loud here.

Caramelized Onion & Eggplant on Toasts

Serves 4-6 as an appetizer 

1 medium eggplant
1 medium onion
4 cloves of garlic, minced or crushed
4-6 tbs olive oil
salt
pepper
1 baguette
plain feta cheese crumbles

Peel and dice eggplant. Peel and dice onion. In two separate skillets, heat up 2 tablespoons of oil over medium-low heat (2 tbs. in each pan). Add eggplant to one pan and onion to the other (use a larger pan for the onion). Eggplant will cook for 15-20 minutes, onions will cook for 20-25 minutes. Both should cook down until very limp and easily cut with your spatula.

After 20 minutes, turn off heat under eggplant. Add minced garlic to onions and continue to cook for another 5 minutes. Add eggplant to the onions. Add salt and pepper to taste. Leave over heat for another few minutes.

Preheat oven to 350. Slice baguette and place slices on a cookie sheet. Since it's being toasted, the bread does not need to be super-fresh. This is a perfect recipe for using up day-old (or several-day-old) baguette remnants. Toast baguette slices in the preheated oven until lightly browned (3 to 4 minutes).

Serve eggplant & onion mix on toasted baguette slices with plain feta cheese crumbles on top.

Monday, September 12, 2011

Greeking Out: Greek Yogurt Cheesecake with Honey Caramel Drizzle

Once upon a time, I thought I didn't like cheesecake. Apparently, I just didn't like bad cheesecake, which, unfortunately is all too common. I will eat less-than-stellar pizza (because, really, no pizza is that bad) and I'll eat sub-par chocolate chip cookies (I'm only human after all), but when it comes to something like cheesecake, I only want to eat it if it's really, really good. 

I decided I wanted to make my own cheesecake - something I've never done - in the middle of my Greek yogurt/granola snack a few weeks ago. Good Greek yogurt is so creamy (even the nonfat kind), and so tangy it will make your toes curl. I don't know what weirdo thought fermented dairy sounded like a winner, but god bless his deviant soul. On the heels of sampling some of the tastiest cheesecake in town at Estadio (manchego cheesecake w/quince preserves and pistachio granola), I felt inspired to make a great cheesecake with Greek yogurt. So when I attempted it over Labor Day weekend and it was only so-so, I was bummed. Not only was it not up to my eating standards, but I didn't want to blog about it. I wanted to try again and I wanted it to be better. Better, damnit.

So I did. And it was. Way, way better.
The first time around, I used too much yogurt. The cake didn't have enough substance and it just kind fell apart when I sliced it. I also decided to beat the egg whites before adding them (some cheesecake recipes call for beaten whites and I thought this would make for a fluffier cake). But it was too fluffy, resulting in more of a souffle than a cheesecake. Plus I had the genius (read: opposite of genius) idea to use some of the caramel sauce as the binder for the graham cracker crust. That was straight stupid. It made the crust hard and chewy - not a good counterpart to something soft and creamy like cheesecake. But I make these mistakes so you don't have to. You're welcome.

The second time around, I switched up the proportions and simplified the recipe. I should have known that simpler is (almost) always better. I got a much sturdier cake that cut like a dream. And the flavor was exactly as I'd hoped - the cake was tang-central, properly sweetened with the honey caramel sauce.

And that sauce? It's truly obscene. Like, prepare-to-lock-your-fridge-and-throw-away-the-key obscene, unless you want to drink it all before the cheesecake hits the table. I wanted a honey topping because Greek yogurt and honey go together like Larry and Balki. When I was first making it, I was actually prepared to be disappointed. The quantity was overwhelming (fixed for you below) and as I was pouring in the condensed milk, I just didn't think it was going to taste like honey or caramel. And honestly, the honey flavor isn't that strong. But shoot, the flavor of awesome comes through in full effect. I guess that's what sugar, sugar, sugar and butter will result in.

Finally, I read a lot of articles about whether to use the oft-questioned water bath. Some folks are convinced that cooking a cheesecake in a water bath results in a moister, more evenly cooked cheesecake. Others insist that it makes no difference. I concluded that the extra work + risk of leakage into my springform pan = not worth it. I'm pretty sure, for this cheesecake recipe at least, there was nothing to be gained from a water bath, so save yourself the trouble.


Greek Yogurt Cheesecake w/Honey Caramel Drizzle

*Note: The recipe below is for a standard 9" or 10" cheesecake. Pictured above is a 6" cheesecake, which I made by halving the ingredients (except for the crust, as noted in the instructions). I would stick with the same amount of caramel drizzle regardless of the size of the cheesecake (the original caramel drizzle recipe is double what I have listed below and it results in so much caramel, it was coming out my ears). 

Graham Cracker Crust
15 graham crackers (15 of the big rectangles)
5 tbs. melted butter
 (for a 6" pan, use 6 graham crackers and 2 tbs. butter)

Grease a 9" or 10" springform pan with butter. Break down crackers into crumbs using a food processor or blender. Add melted butter to graham crumbs and stir. The mix will still be crumbly, but moist. Press crumbs evenly into the greased pan, spreading slightly up the sides of the pan. Place pan in the refrigerator while you make the filling.

Cheesecake
16 oz. lowfat cream cheese or neufchâtel (2 packages), room temperature
1 cup sugar
1-1/2 cups plain, nonfat Greek yogurt
2 egg, plus 4 egg whites

Preheat oven to 325 degrees. Using an electric mixer, blend room temperature cream cheese with sugar. (It is imperative for this recipe that the cream cheese be room temperature, otherwise you will have cream cheese chunks. If you are absolutely out of time, microwave the cream cheese in 5 second increments until soft.)

Mix in yogurt, eggs and egg whites. Continue to mix with electric mixer until smooth. The batter will be runny, like a cake batter. Pour batter into chilled pan over the graham crust.

Bake at 325 degrees for 45-55 minutes (time will depend on the size of the pan; larger pan will cook faster). Cook until cake is mostly set, but the center is still jiggly. The cake will rise a little and you might see browning around the edges, but you won't see any browning on the top. 

Let cool and then refrigerate for at least 2 hours before serving.

Honey Caramel Drizzle (from My Homemade Life)
1/4 cup honey
4 tbs. (1/2 stick) unsalted butter
1/3 cup brown sugar
7 oz. sweetened condensed milk (1/2 can)

Add honey, butter and brown sugar to a small saucepan and bring to a roiling boil. Let boil for two full minutes. Remove from heat and stir in sweetened condensed milk. Serve warm or store in the refrigerator in an airtight container. When ready to use, microwave the sauce in 20 second increments, stirring each time (this sauce will burn easily in the microwave, so don't overdo it). 

Drizzle slices of cheesecake with warm honey caramel sauce.

Wednesday, August 31, 2011

Food Court Salvation: Spicy Red Lettuce Salad

If you try to maintain any semblance of a healthy lifestyle, you don't get psyched to eat in mall food courts. (Unless of course, you have a weakness for Arby's - not naming any names here - in which case, bring on the Horsey Sauce.) It recently got to the point where I was pushing "business casual" a little too far, so I resignedly hit the mall. Cringe. I used to relish the mall. I could spend hours window shopping and searching for killer deals. But that was back when: a) I could leisurely cruise the mall on a weekday, sans the throngs of weekend shoppers who, literally, could not give a sh*t that they are directly in your way of getting anywhere; and b) I had reason to shop for clothes other than button-down shirts and knee-length skirts.

So picture this: you're tired of shopping and hungry for a salad. You survey your food court choices - bad, bad, worse, barf-worthy, and then . . . a little ray of hope? Salad Creations. It looked pretty unimpressive with its sad neon sign and non-existent line, but nothing was pre-packaged and the ingredients looked pretty fresh. So I ordered the spicy veggie salad, which included cilantro and cayenne pepper, two of my faves. I can safely say that my expectations (granted, they were low) were blown out of the water. The food court grew dim and a shiny gold light emanated from my plastic salad container.* Angel voices poured from the greens.* Shoppers crowded around me for a glimpse of my ethereal meal.*

*Gross exaggerations. But, heck, the salad was good. 
These red beauties came straight from our little veggie garden. And in case anyone's curious, the photo above might be one of my favorite that I've ever taken.
Shortly after my Salad Creations revelation, I decided I needed to recreate it at home. The key players are the cilantro, the cayenne pepper and the avocado. Nothing too crazy about the ingredients individually, but the combo is a flavor bonanza that's hard to find elsewhere in a cold salad. My friend Jenn was coming over for dinner - one of my few friends that I could serve a vegetarian salad to as a main course and not have her question it - so I gathered my fixins and let 'er rip.

My salad didn't taste exactly like the one from Salad Creations (I have to imagine that they use a high dose of salty seasoning that jacks up the flavor), but mine was pretty darn good. I've found that cilantro is a polarizing herb - people either love it or hate it. But when coupled with the spicy cayenne pepper, creamy avocado and crisp red lettuce, I can't imagine anyone not liking this salad. The cilantro and pepper provide a flavorful heat and the avocado is like a soothing palate cleanser. A built-in sorbet if you will. In any event, for those who like to make salads at home, this is a fun, delicious twist on your average veggie salad. And if it's not on your radar, red lettuce is awesome. It's no more expensive than romaine, but in my opinion, the curly red leaves retain their crispness better. Make it happen.

I served the salad with rosemary roasted sweet potato slices, which were a perfect, hearty compliment. Instructions included below.

Spicy Red Lettuce Salad

Serves 4 as an appetizer, 2-3 as a main course

Salad
1 large head of red lettuce
2 big carrots, shredded
1 large tomato (or 3-4 little guys), diced
1/2 cucumber, cut into chunks
1 green bell pepper, cut into chunks
3/4 cups black beans, rinsed and drained
1 whole avocado, diced
cilantro, roughly chopped (I used 1 heaping cup of leaves loosely packed, or about 1/2 a bunch)

Dressing
3 tbs. olive oil
2 tbs. balsamic vinegar
1/4 tsp. cayenne pepper
1/4 tsp. seasoning salt
(makes for a lightly dressed salad)

Add all salad ingredients to a bowl. Mix dressing ingredients in a small bowl with a whisk and pour over salad. Toss the salad to distribute dressing.

Serving suggestion: Roasted Rosemary Sweet Potatoes (serves 4)

Wash and slice two sweet potatoes or yams, unpeeled (I might peel off a few strips if the skin is particularly rough or knotty). Toss potato slices in 3 tbs olive oil and 2 tbs chopped, fresh rosemary. Bake at 400 degrees for 30-40 minutes or until roasted. Flip potatoes halfway through roasting.

Monday, August 29, 2011

Chewy Chocolate Chip Gingerbread Cookies

Good news: we survived the earthquake. And the hurricane. The only casualties were an Ikea picture frame (earthquake) and a Saturday bike ride (Irene). And I may have sustained some minor injuries to my liver. Nothing like a natural disaster to promote drinking. On the upside, as a result of Mother Nature's two field days, I got an entire afternoon off work and had reason to test out this recipe for chocolate chip gingerbread cookies. Two big wins in my book. 

A couple weeks ago, I went to a bachelorette party at a resort in Leesburg, VA. Before I got there, the girls had gone to the Leesburg Farmer's Market and returned with a solid haul. (I wish I could have joined them, but unfortunately, no amount of sacrificial Ikea frames was going to get me out of work that Saturday morning.) The gals bought homemade yogurt, fresh flowers and an assortment of locally-made cookies. Oh, the cookies.

The cookies came from Lola Cookies & Treats and yikes, they were dangerous. One flavor in particular, the ginger chocolate chip, blew me away. Generally, if I look at a cookie tray and chocolate chip is an option, that's what I choose. And when I go for something different, I usually wish I had just chosen chocolate chip. But Lola's gingers - which showed no visible signs of chocolate chips - looked super chewy and smelled like ginger heaven. Little did I know that hidden in the depths of each brown-sugary ginger bite, was bits of milk chocolate. When I started munching and discovered the chocolate chips, I nearly. freaking. screamed. In case you haven't noticed, I'm really passionate about good desserts. (Largely because so many storebought desserts are a tragic failure and a waste of calories.)   

The ginger base of the cookie was just as deliciously chewy as it looked and the big chocolate chips were like solid flavor gold. Mixing ginger cookies with chocolate had never occurred to me. Surprise flavor combinations rock my baking world.


One of the reasons I loved the Lola's cookies so much is because the chocolate was a total surprise. They just looked like regular ginger cookies and then, BAM! Chocolatey goodness. So here, I wanted that traditional ginger cookie look of cracks on top, with surprise chocolate chips in the middle. But it's a little time consuming to fold the chocolate chips in the the center of each individual cookie. And I'm guessing the general public is not obsessed with hiding their chocolate chips like me. So for this recipe, I recommend that you just fold the chocolate chips into the dough. If you like the idea of "surprise" cookies, take 5-6 large chocolate chips and press them into the center of a pre-scooped dough ball (like in the photo above). Then wrap the dough around the chocolate chips and roll between your palms for an even ball shape.  


Chewy Chocolate Chip Gingerbread Cookies
Ginger cookie recipe from epicurious

Makes 30 2" cookies

2-1/4 cups all purpose flour
2 tsp. baking soda
1/4 tsp. salt
1 tsp. cinnamon
1 tsp. ground ginger
1/2 tsp. ground cloves
3/4 cups (1-1/2 sticks) butter, room temperature
1 cup brown sugar
1 egg
1/4 cup molasses (unsulphured)
1 cup large chocolate chips (Ghirardelli and Guittard brands are both large)
sugar for rolling (1/4 cup)

Preheat oven to 350 degrees. Stir together first 6 ingredients. Cut room temperature butter into chunks and add to dry ingredients. If you've forgotten to take your butter out early, microwave butter for 7 seconds, flip, and microwave for another 7 seconds. Using a hand mixer or stand mixer, blend dry ingredients and butter for 4 to 5 minutes or until the mix resembles brown sugar. There should be no chunks of butter remaining.

Add brown sugar and mix for another 30 seconds. Add egg and molasses; mix until fully incorporated. Fold in chocolate chips with a spatula (obviously, if you can't find large chocolate chips, regular-sized chips are fine). Using a medium cookie scoop, scoop out even portions of cookie dough and roll between your palms to get a nice round ball. If you don't have a cookie scoop, use two tablespoons of dough per cookie. Roll each dough ball in sugar. Place each ball on a parchment-lined or silpat-lined baking pan around 2 inches from the next cookie. Bake at 350 for 11-12 minutes.

Please report back if you are as obsessed with the result as me. Thx.

Note: Molasses smells bad. Just trust the recipe. I used Grandma's Original (unsulphured). Just make sure to buy molasses that is unsulphured and don't buy anything that says robust or blackstrap.


Monday, July 11, 2011

Mini Chess Pies for the Birthday Girl


Some birthday girls like to be treated to breakfast in bed. Perhaps eggs and hash browns with a side of bacon on the plate. Today's birthday girl opted for breakfast on the road (in the middle of a 70 mile bike ride). And a side of bacon served out of a bike jersey (literally, one of the birthday celebrants stashed some bacon strips in her jersey for snacking while she pedaled). Unfortunately, I missed the birthday bike ride and what sounds like the crème de la crème of cycling rest stops that was rumored to include cupcakes, grilled cheese and lots and lots of bacon.  (Clink, clink - those are the shackles of my job that kept me from birthday bike riding fun.)

Foooortunately, Birthday Girl wanted to keep on celebrating with an evening rooftop bbq! I didn't get out of work until late in the afternoon and I knew if I wanted to bake something, it would have to be super quick. So I took an already fast dessert, chess pie, and pared it down to individual chessies. Making mini chess pies cut down on cooking time and made for cute and easy serving. Perfect for an outdoor bbq.
(This guy seems to be questioning his future.)


There was a time when I didn't understand chess pie. I didn't understand why someone would want a dessert that was flavored with just sugar and butter, and didn't even have frosting (I'm biting my own tongue as I write this). No chocolate? No fruit filling? No thank you. (Sidenote: I didn't encounter chess pie until I moved to Washington, DC as an adult. Otherwise, I certainly would have had a better appreciation for the stuff. Probably from birth.)

Then I actually tasted it. I sampled chess squares and crack pie and vinegar pie and hot damn, they were good. It was like little bites of sugary heaven. And it was a reminder of what an awesome science baking is. Chess pie is made from the most quintessential baking ingredients: eggs, flour, butter, and sugar. These commodities are cheap - or as cheap as food comes these days - and can be stirred together to produce edible gold.
  

Chess pie has many variations. Sometimes it has a pastry pie crust and sometimes the topping is made with cream cheese rather than egg whites. I'm sure that a great many varieties are equally delicious, but the beauty of this particular recipe is its ease. You likely have all of the ingredients in your kitchen right now and you can make it start to finish in under an hour.

And here's the Birthday Girl (center), with our nation's capitol in the background. BG happens to hate hugs. As you might imagine, a girl who hates hugs gets more birthday hugs than any typical birthday girl. Obviously.

Mini Chess Pies 
(adapted from cooks.com)

Makes 24 individual pies

Base layer
1-1/2 cups unbleached, all-purpose flour
1 cup sugar
1 tsp. baking powder
1/2 tsp. salt
2 egg yolks (save the whites for the topping)
1/2 cup butter, softened
1 tsp. vanilla

Topping
3 eggs whites
1-1/4 cup brown sugar
1 tsp. vanilla

Preheat oven to 300 degrees. Line two 12-cup muffin tins with paper liners. Stir or sift together dry ingredients for the base layer. Mix all base layer ingredients together using an electric mixer. Make sure butter is soft enough to be blended into try ingredients, but not melty. Mixture will be dry and crumbly. Divide evenly among muffin cups (around 2 heaping tbs. per cup). Press down evenly into muffin cups (tip: use the bottom of a glass that is slightly smaller than the muffin tins to pack down the crumbs).

For topping, beat egg whites with an electric mixer until they are thick and foamy (tip: whites beat up best when close to room temperature). Mix in sugar and vanilla. Add a heaping spoonful of topping to each of the muffin cups and gently spread around with a spoon so that base layer is covered with topping.

Bake at 300 degrees for 20-24 minutes (22 minutes was perfect for me). Tops will puff up slightly and turn golden-brown. Let cool before serving. Present to your favorite birthday girl with a side of bacon.

These mini pies still taste great after being stored overnight in an airtight container.


Friday, June 17, 2011

Swiss Chard with Baby Onions: Yuppie Alert

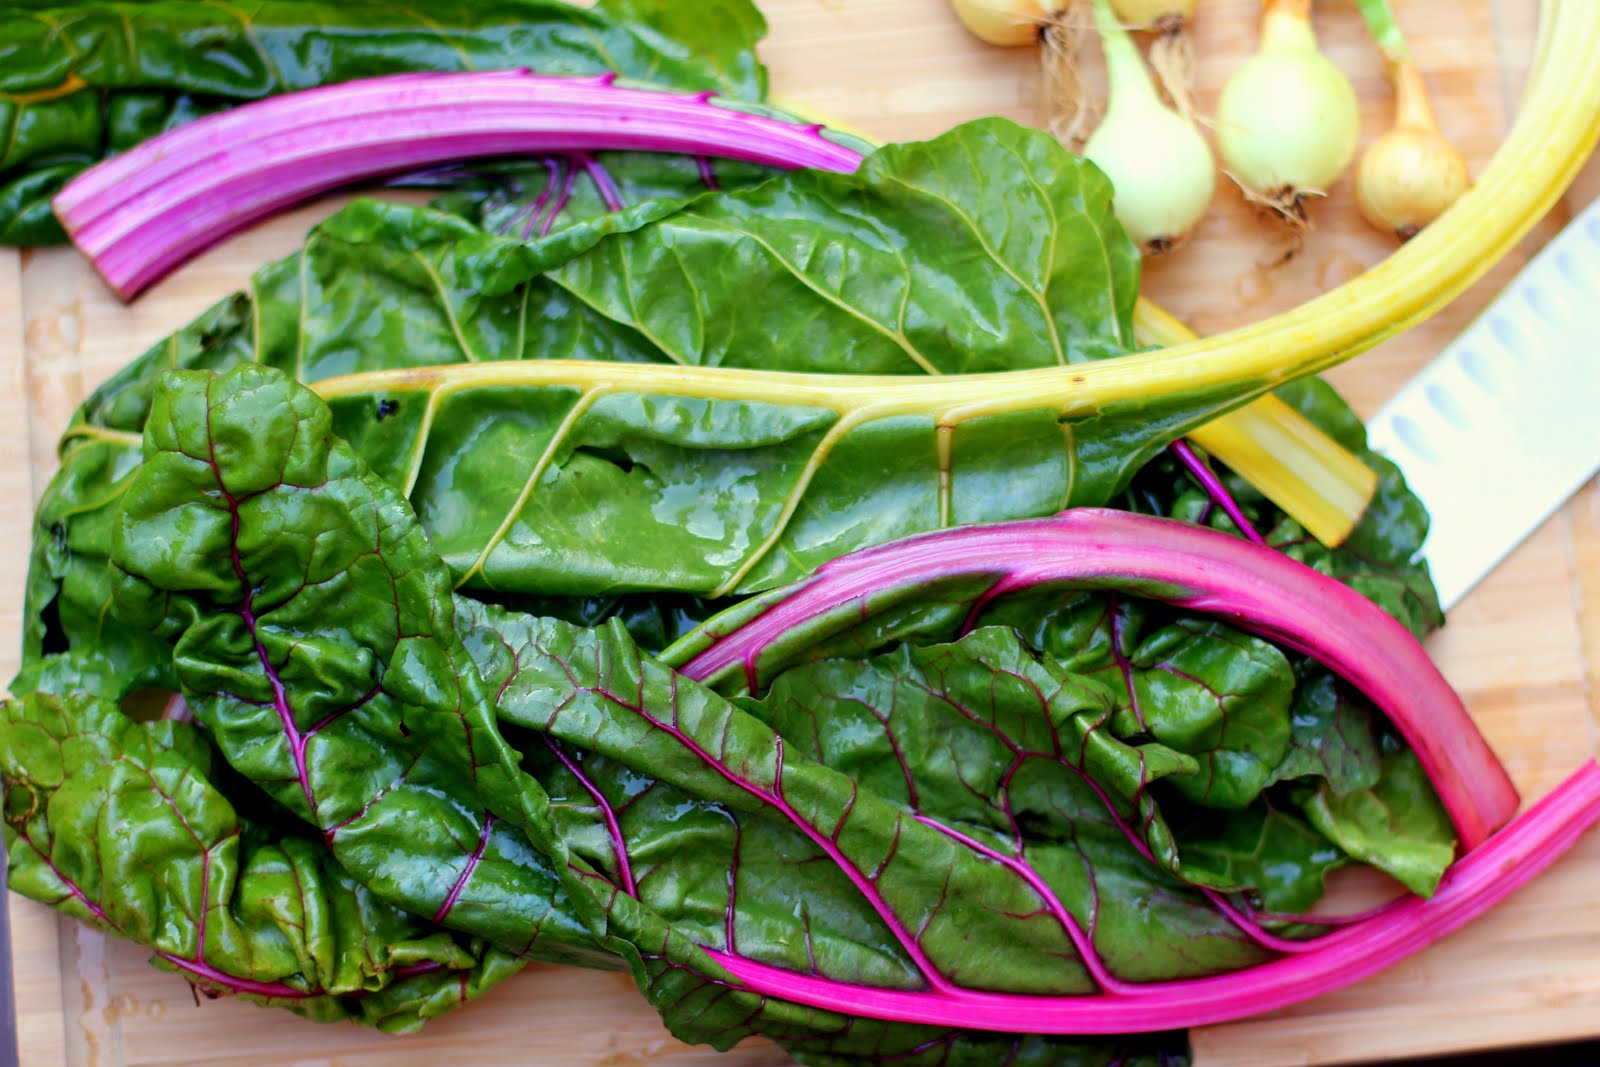
Is it me, or is this like some kind of magical, Disney-world style vegetable? I mean look at those colors! You just don't find these kinds of greens in your local grocery store (at least not my grocery store). Or maybe these leaves are from outer space. Maybe when you come from a planet where the greens look and taste as good as these, you eat them morning, noon and night. And that's why aliens are all green and glowy. Stephen Hawking, I hope you're catching this breakthrough. 

You might be wondering how these extraterrestrial greens made their way onto my cutting board. Three letters - A-L-F. Nah, just kidding, the letters are C, S and A. Ours comes from Shallowbrook Farm in Boyce, VA, though I haven't been there and cannot confirm nor deny whether their seed shipments come via UFO. 
CSA stands for community supported agriculture. But you knew that. Because CSAs are all the rage right now, particularly with young, urban professionals. And that's me. So duh, I signed up to have expensive vegetables trucked into downtown DC (near my office), so that I can cart them home on the overcrowded Metro and do everything in my power scarf them down in the 3 days I have until they go bad. Oh, there's wacky vegetables I wouldn't even sneeze on at the grocery store? That's the charming allure of CSA shipments!  

In all seriousness, I'm not down on the CSA - it just involves a learning curve. Our shipments comes on Wednesday and I've learned that unless Travis and I are going to eat two zucchinis and two squash by Friday, I need to slice them up and put them in the freezer. I've learned that CSA veggies are in fact much more delicious than grocery store vegetables, and so they really only need salt, pepper and a little oil if you want to cook them. I've learned that everything needs to go in the fridge. Immediately. Better yet, everything needs to be cut up and ready to eat straight away - that will increase the odds of consumption before they go bad.

I really like supporting farmer Eric of Shallowbrook Farms. He sends out long, informative emails about the weather and crops (I think he's managing expectations). It's like we're already BFFs. And I understand that the reason the veggies go bad so quickly is that they aren't treated with the same chemicals that many commercial farms use to preserve vegetables for cross-country shipping and days or weeks on the store shelf (at least I hope that's why, otherwise Eric's got some explaining to do). So for these reasons, I'm going to keep trying to make this CSA business work.
 
And then when a rare, amazingly cool item shows up in my CSA box, I forget about any gripes. This Swiss chard was beautiful and SO flavorful. And the tiny onions? I don't even know what they are (they weren't cipollinis, maybe something similar), but they were sweetly delicious and a perfect compliment to a powerful green like Swiss chard.

This recipe is more of an inspirational message than an actual recipe. There's not much to it, and certainly nothing you couldn't come up with on your own. But next time you have some random greens and onions in your fridge - or Swiss chard and baby onions from your own CSA, because you're a yuppie just like me - it's a super tasty serving suggestion.

Swiss Chard with Baby Onions

Serves 2

1 head of Swiss chard, rinsed well and roughly chopped, stalks discarded
4-5 tiny onions (baby Spanish onions or cipollinis will work - NOT pearl onions), quartered
2 tbs. olive oil
salt
pepper

Preheat oven to 400 degrees. In a bowl, mix all ingredients together so that the leaves and onions are evenly coated in oil, salt and pepper.

Spread mix out on an aluminum foil-lined pan and bake for 10 minutes. Give the mix a stir/flip at the 5 minute mark. Some of the greens will crisp up, but probably not all. It makes for a nice blend of textures.

Enjoy!
Related Posts Plugin for WordPress, Blogger...